 | ||
| ||
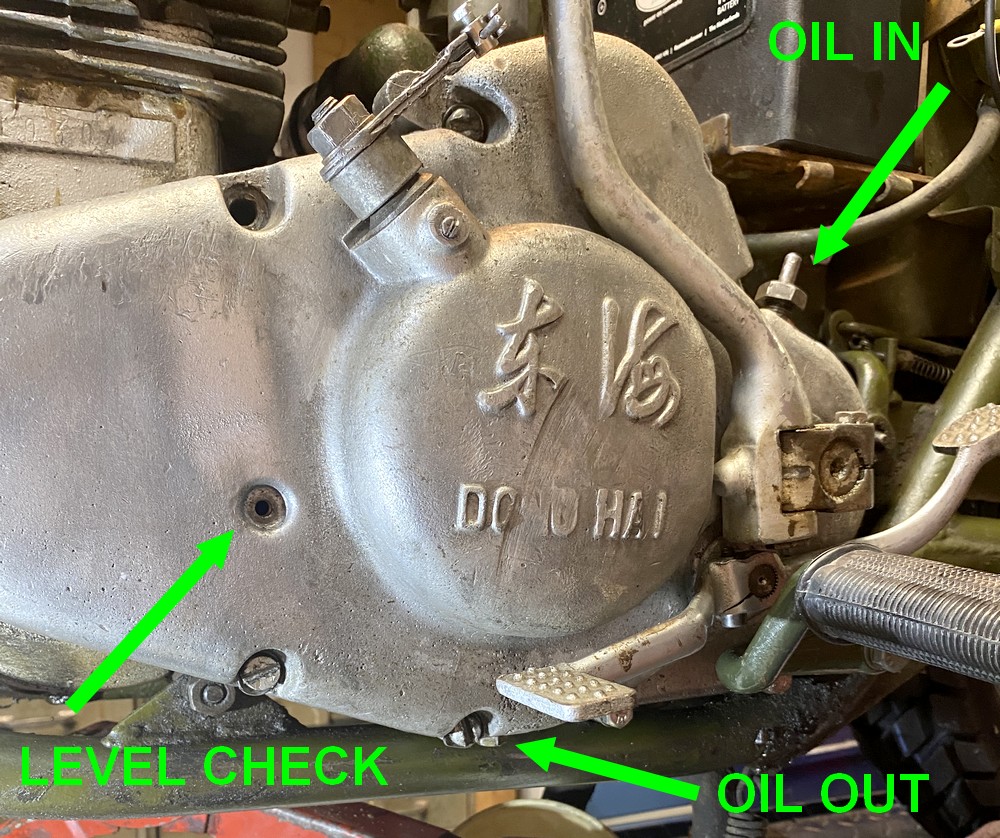
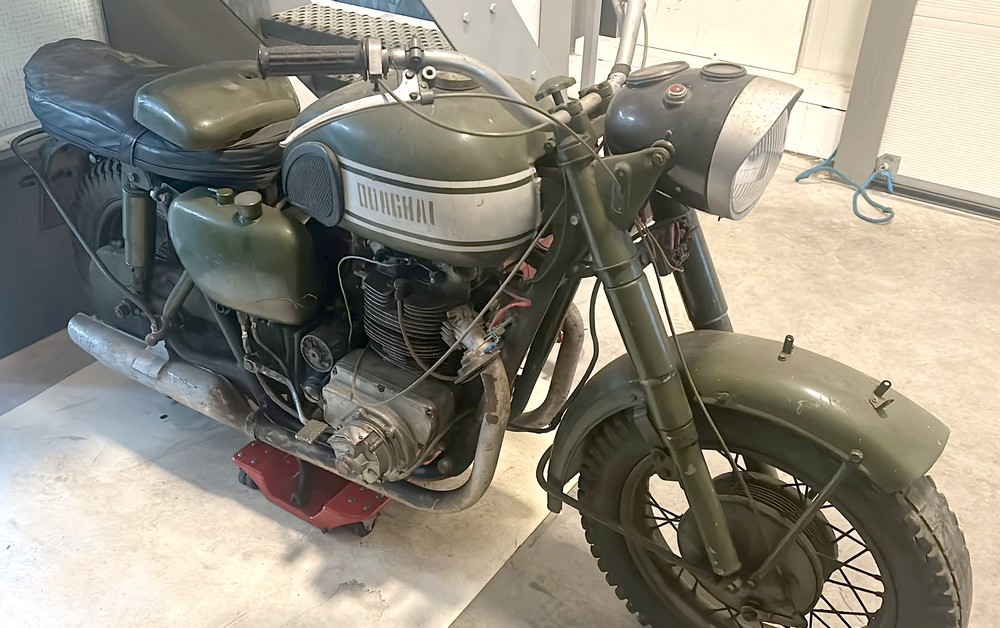
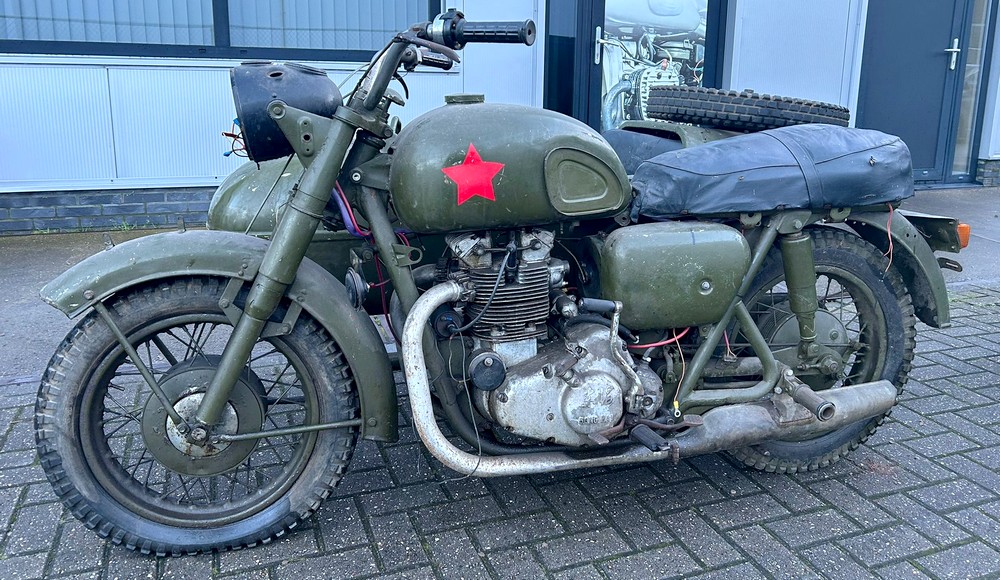
| DONGHAI SM 750/750 A | ||
| Deze pagina's gaan over de zeldzame Donghai SM750. Een in China gemaakte 750 cc staande twin uit de jaren 70 en 80. Er zijn er 3 in Nederland. Omdat er meer belangstelling is uit het buitenland heb ik de meeste tekst met "translate" vertaald. | ||
| Verhaal start onderaan de pagina | ||
|
- partsmanual in German and Chinese publications picturepage geschichte history - | ||
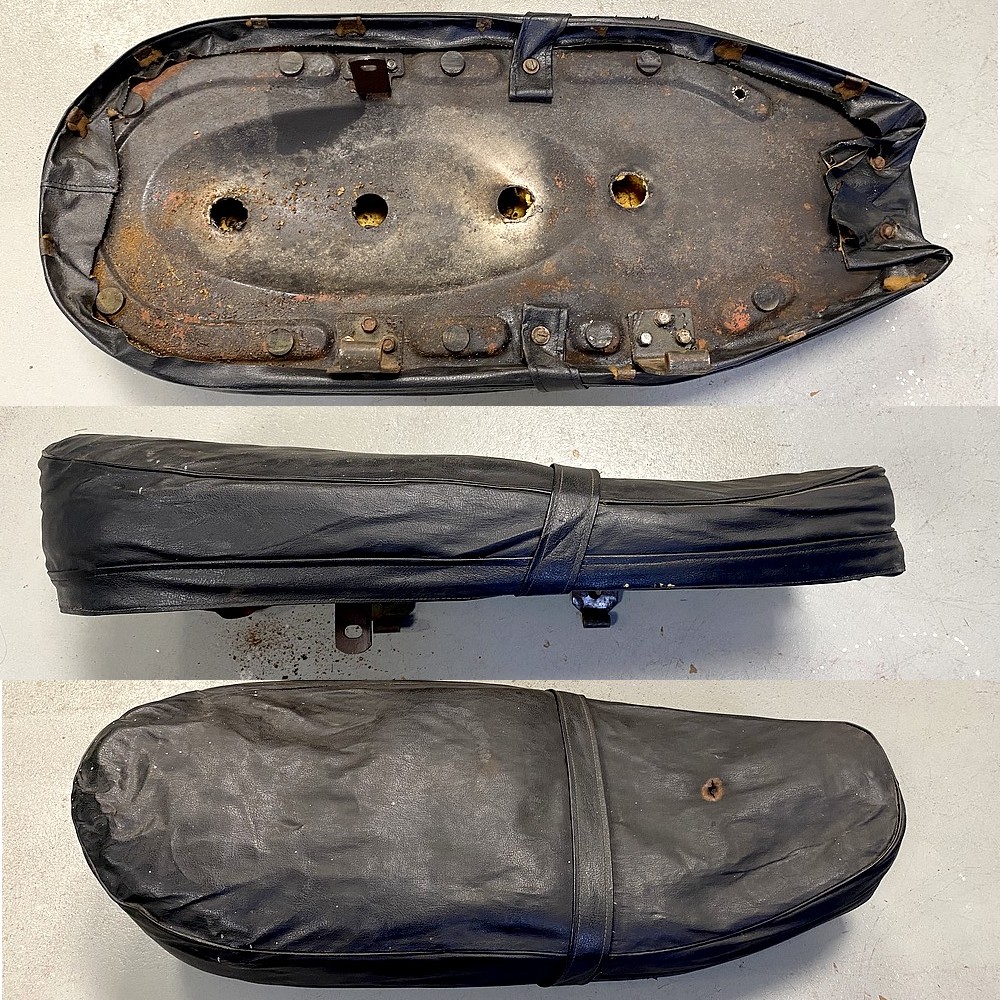
| 18-4-24: The buddy seat has had a tough life. I am now looking for a company that can reupholster it affordably. | ||
 | ||
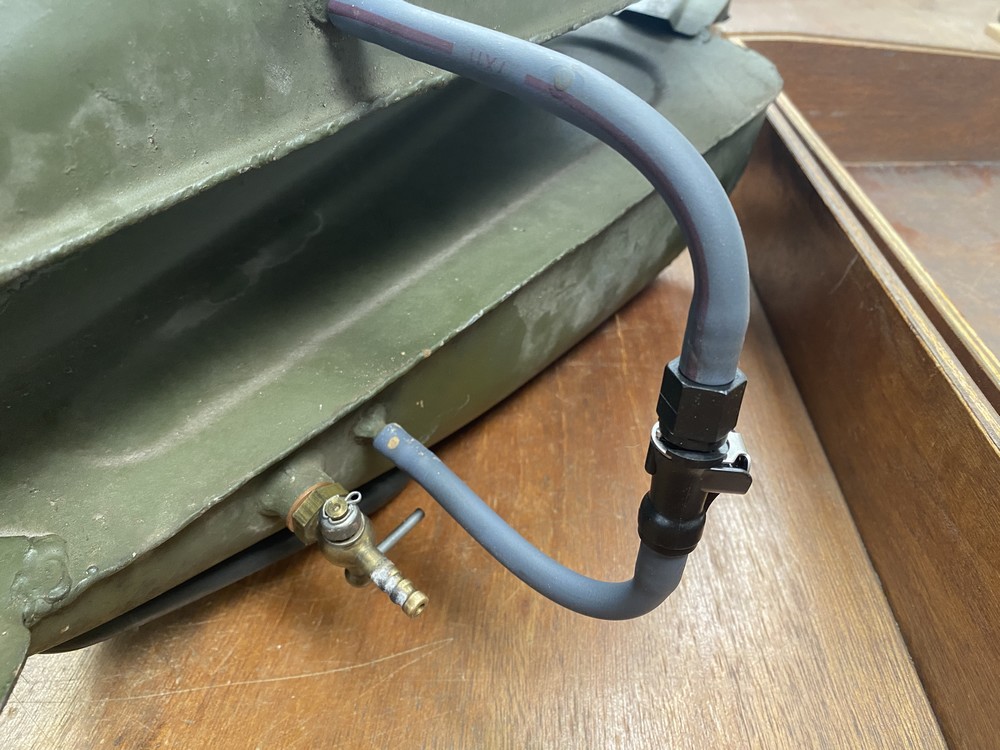
| 17-4-24: Every time I have a gas tank I use a quick release. This makes assembly and disassembly a lot easier. | ||
 | ||
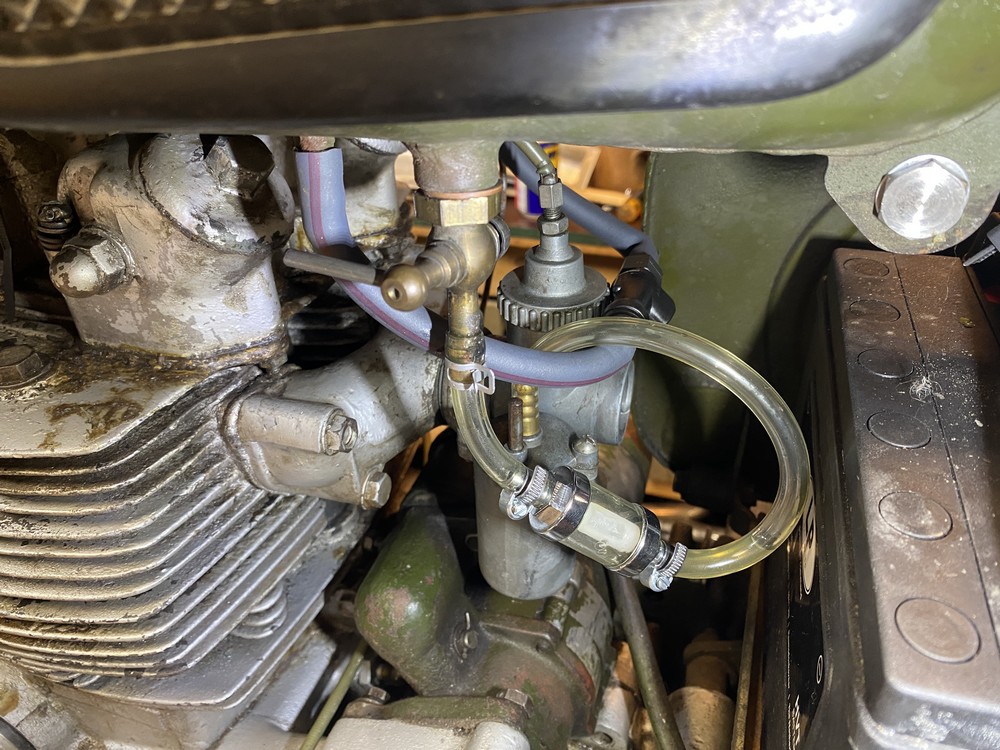
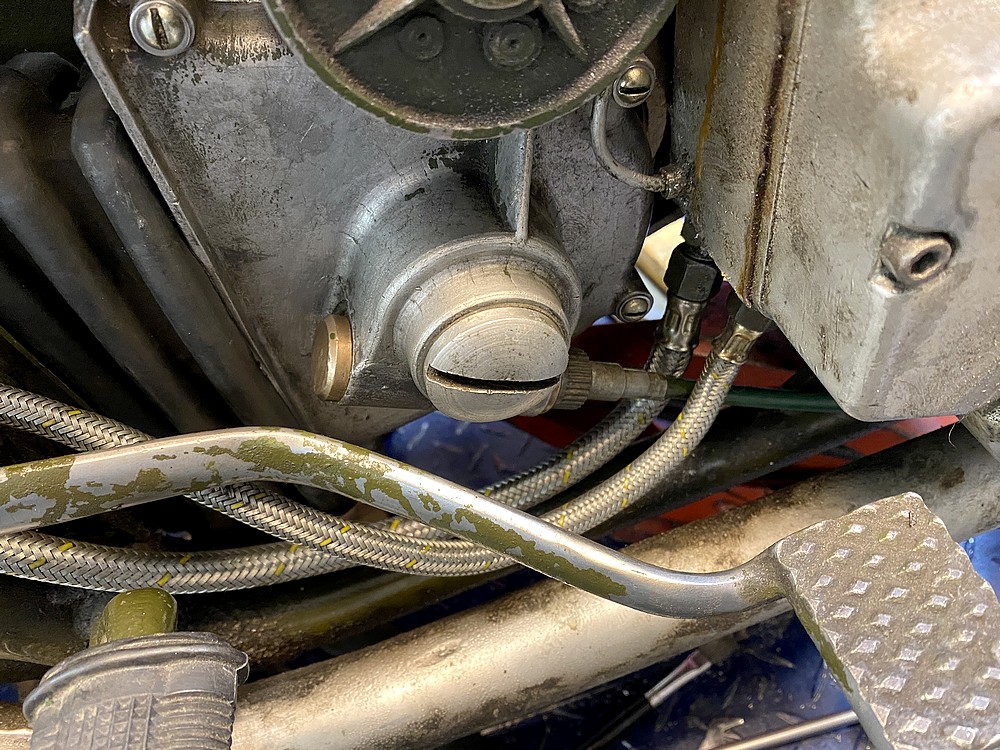
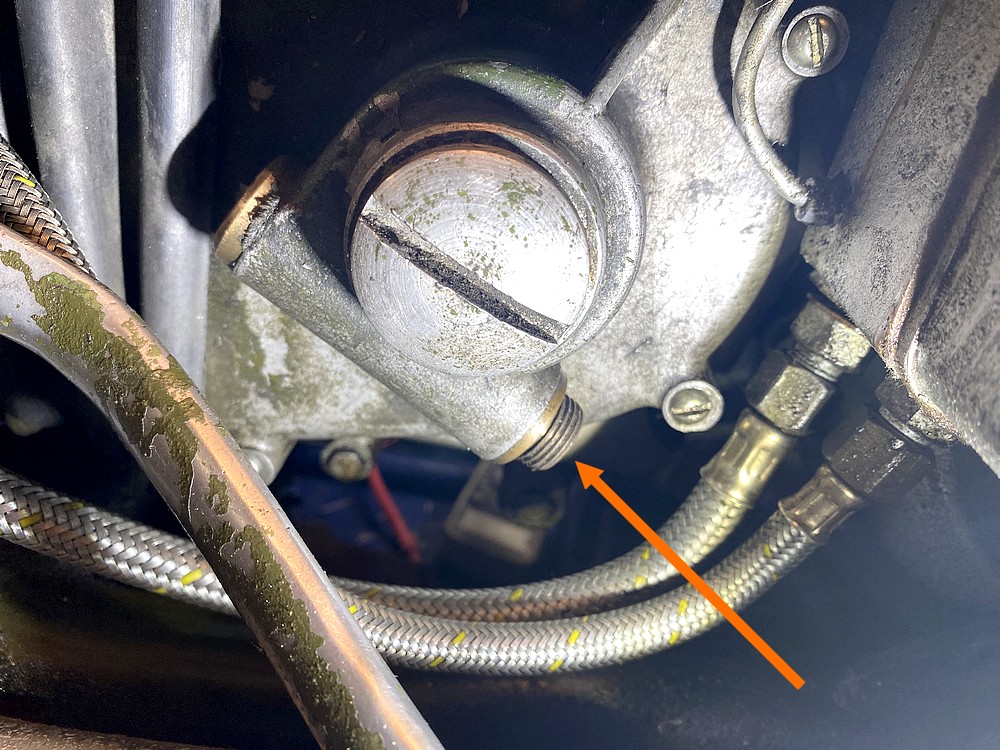
| Just to be on the safe side, I installed a fuel filter with transparent hoses to see if the supply works. | ||
 | ||
| Some bolts have had a hard life because of mechanics with few suitable tools. Although I don't want to make it a show model, I replaced all the bolts with allen bolts. | ||
 | ||
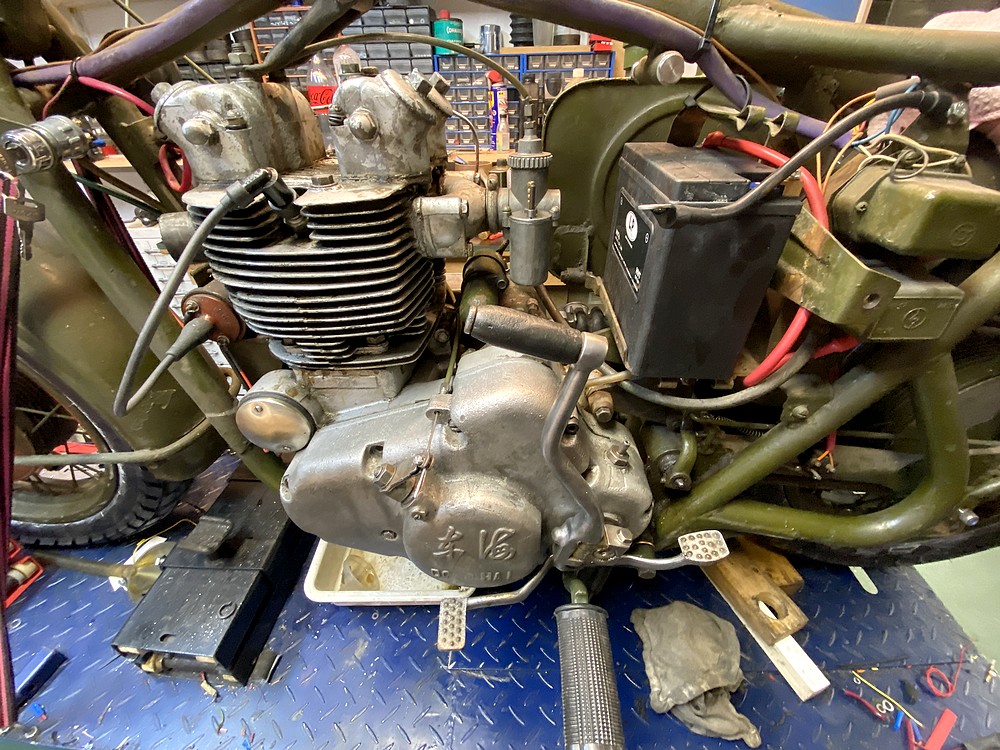
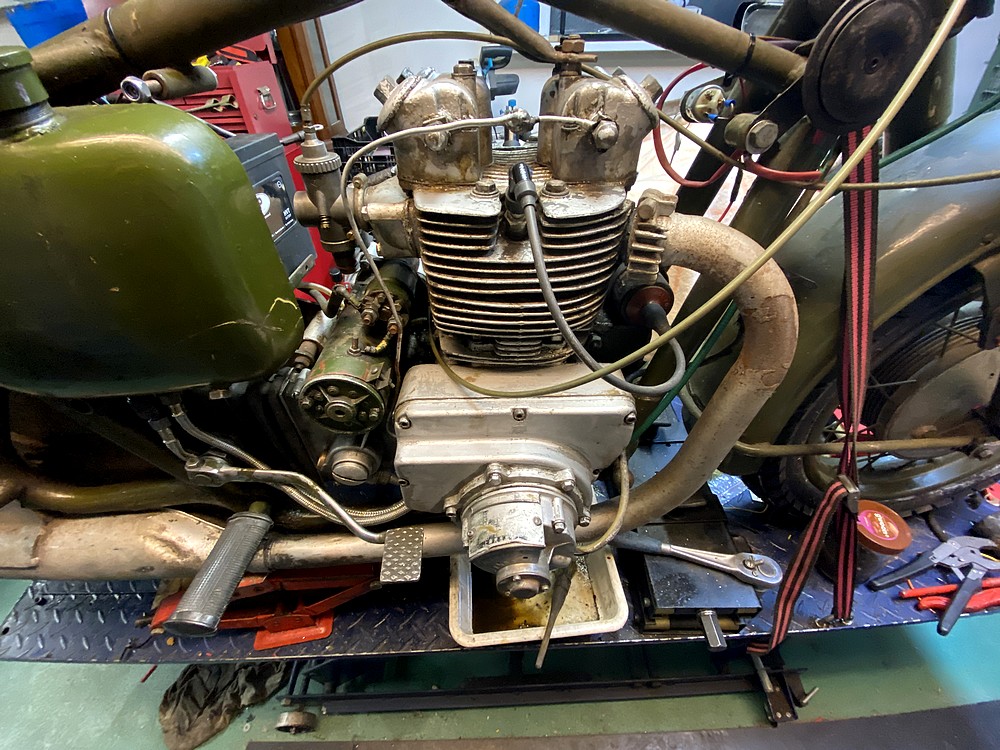
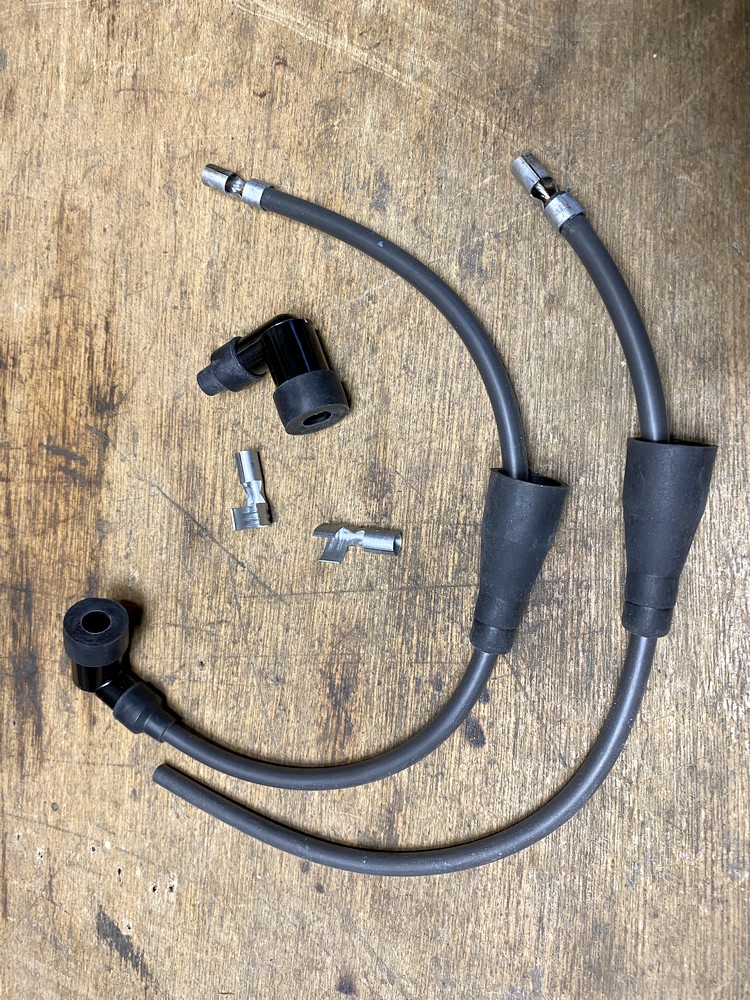
| 16-4-24: Tonight the block was cleaned as best as possible with degreaser. Gave the kick starter pedal a makeover by removing all the paint and installing a new bolt to reduce the play. There is a spring and ball to keep the pedal in place, so I cleaned and greased it. Also made some new cables for the battery. | ||
 | ||
 | ||
| 15-4-24: Due to the motorcycle being parked for a long time, the clutch plates are stuck together. It is sensible to disassemble it, but it is a lot of work. So first tried an old trick. Changed the 3 l. SAE30 oil and then pressed the clutch lever and attached it to the handlebars. Hopefully the pressure and new oil will loosen them. At the end of the day it seemed that the clutch plates were slowly releasing. | ||
 | ||
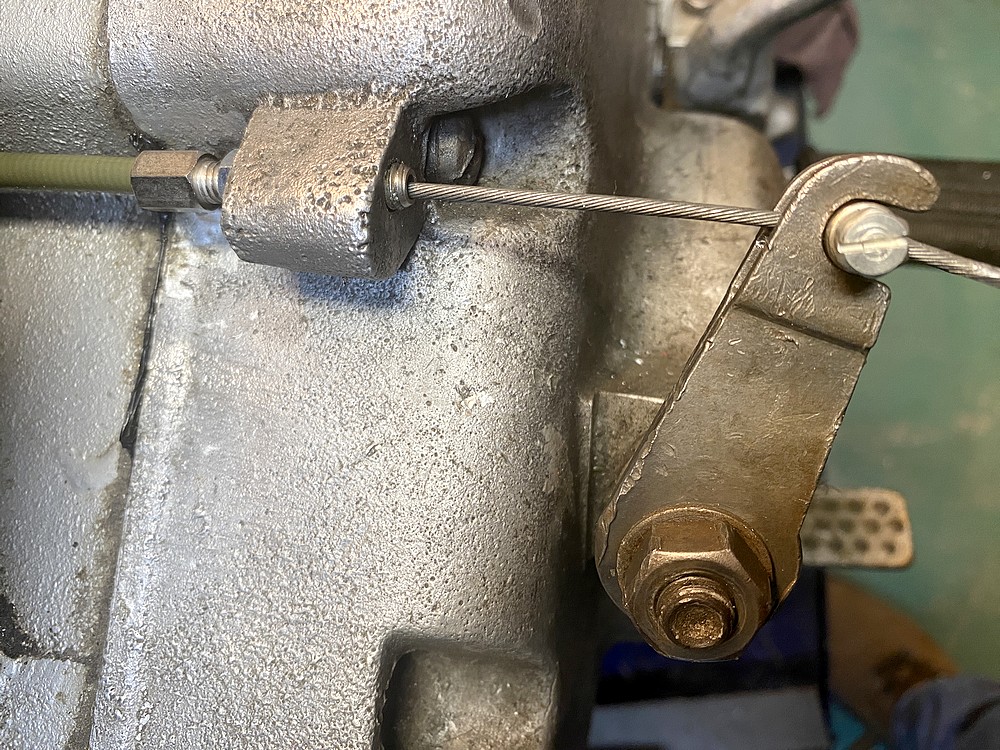
| 12-4-24: To have more options for adjusting the clutch cable, I have added an extra option. I hope that the clutch plates will now come loose without removing the entire side. | ||
 | ||
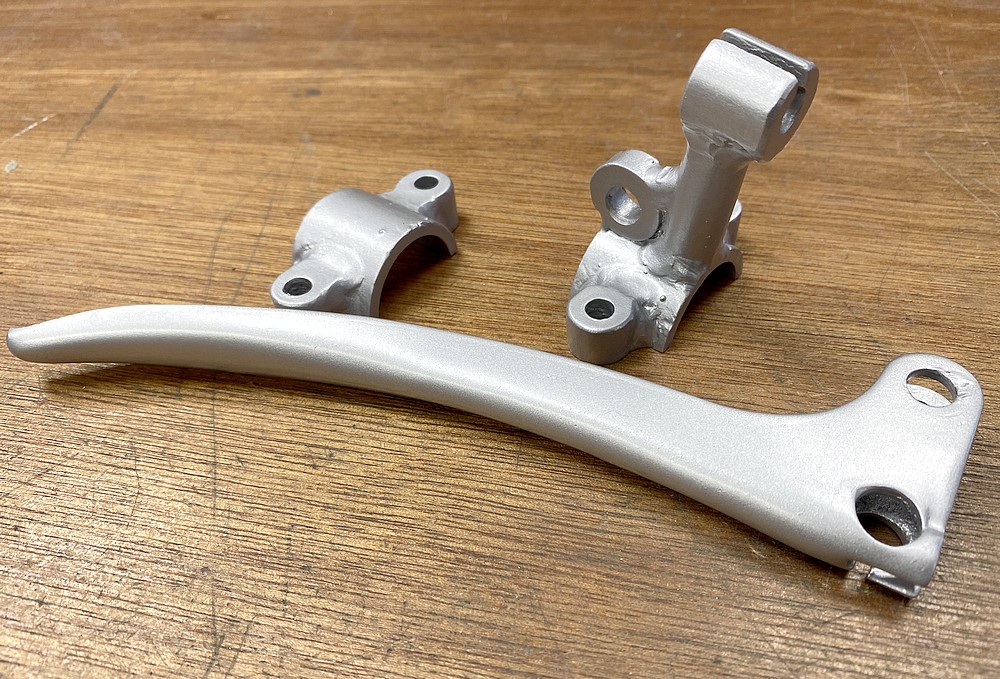
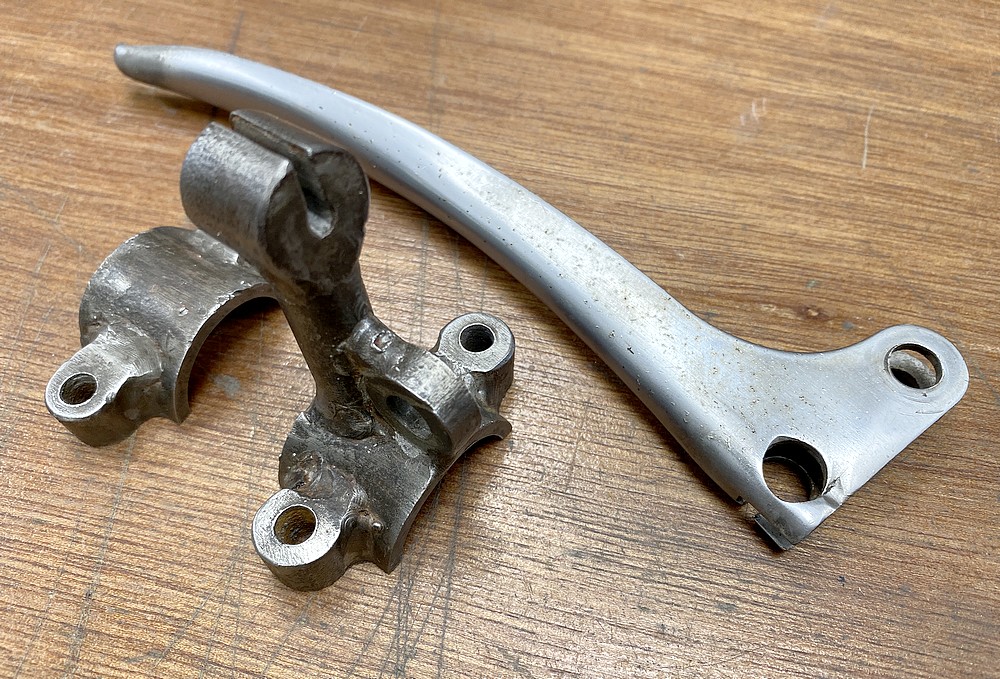
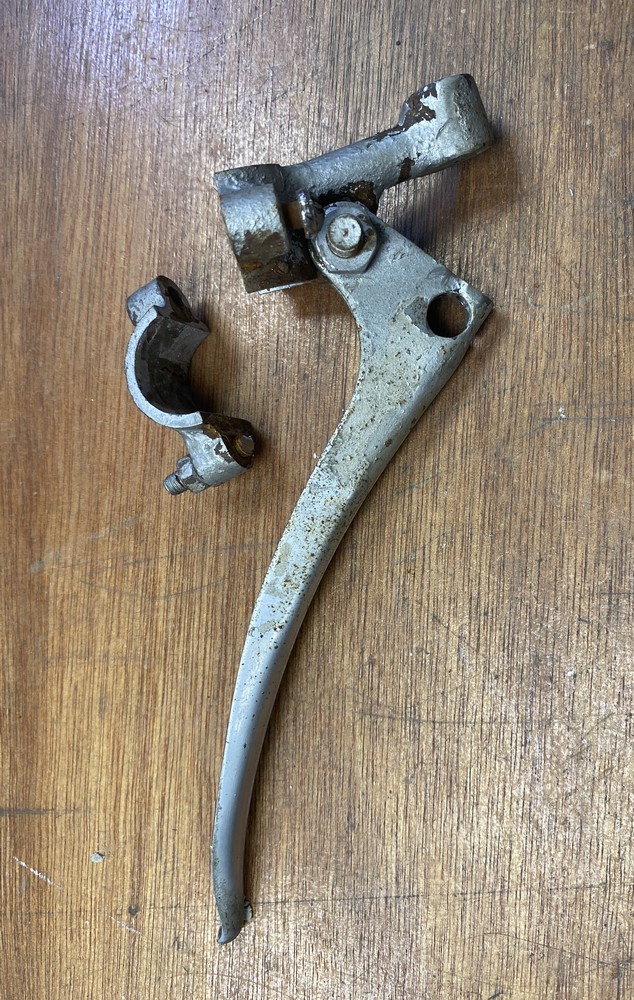
| 10-4-24: I received a complaint today from the clutch lever. He felt misunderstood and that there was discrimination. Quite a hassle. I looked into the matter and found that he was indeed right. So let's get to work tonight and sandblast the aluminum. The handle was still chrome plated with a little rust and could remain that way. Added some stainless steel bolts and nuts. Solved and everyone was happy again. | ||
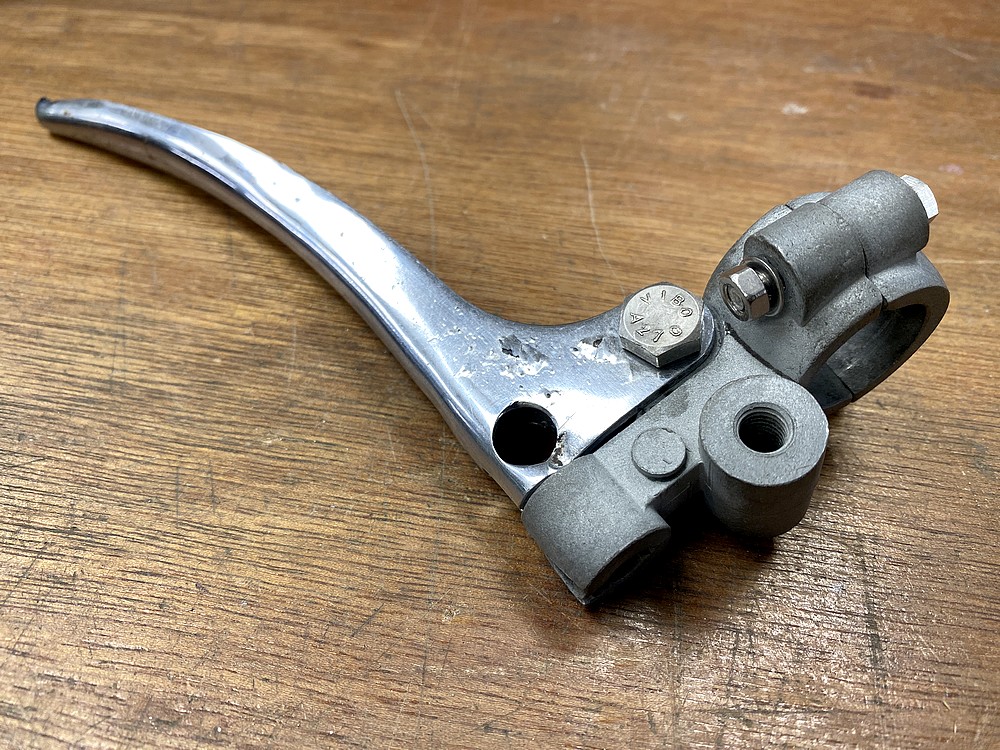 | ||
| 9-4-24: What a wonderful piece of home craftsmanship. If you can't buy it, make it yourself, they must have thought in China. A little silver paint to keep it authentic and so it can last for a few more years. | ||
 | ||
 | ||
 | ||
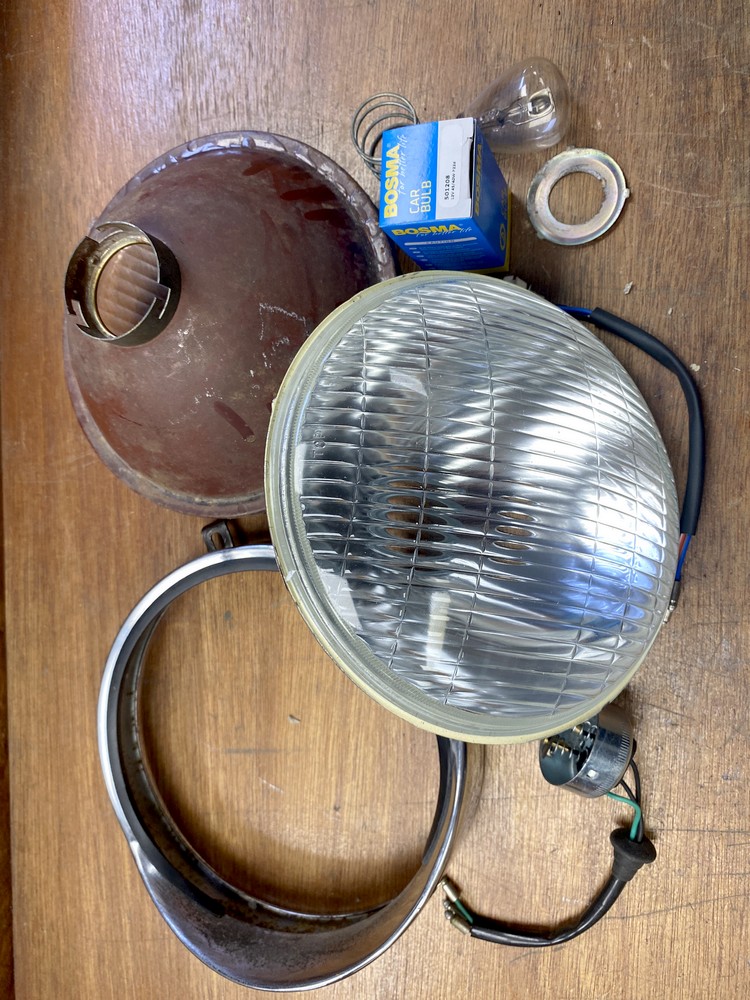
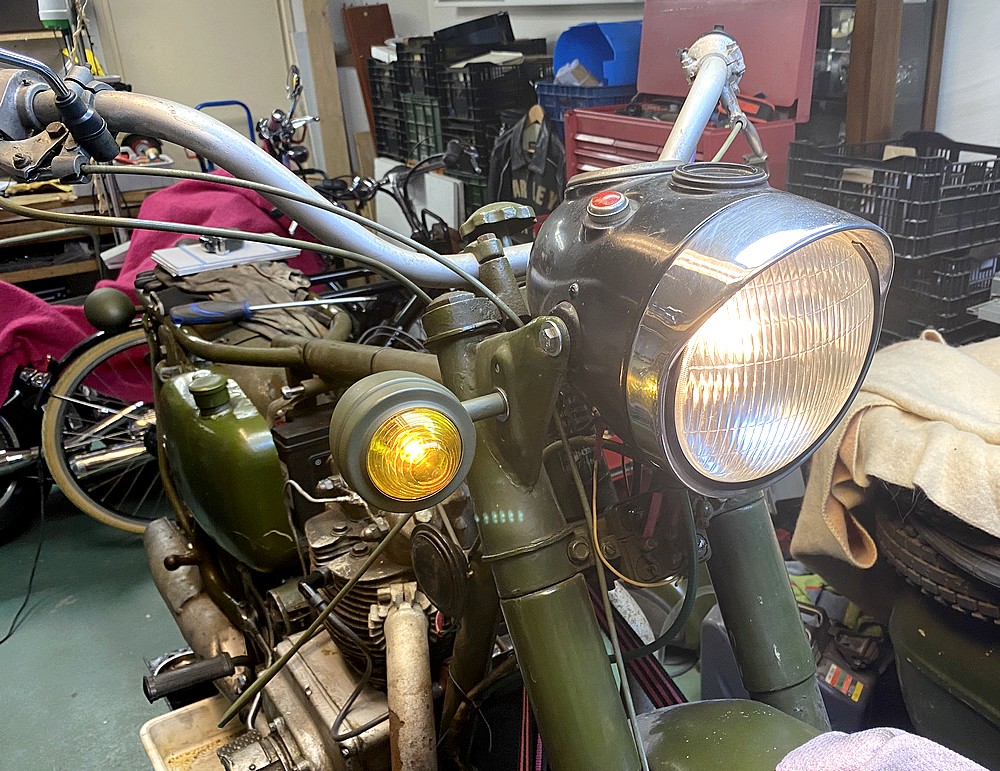
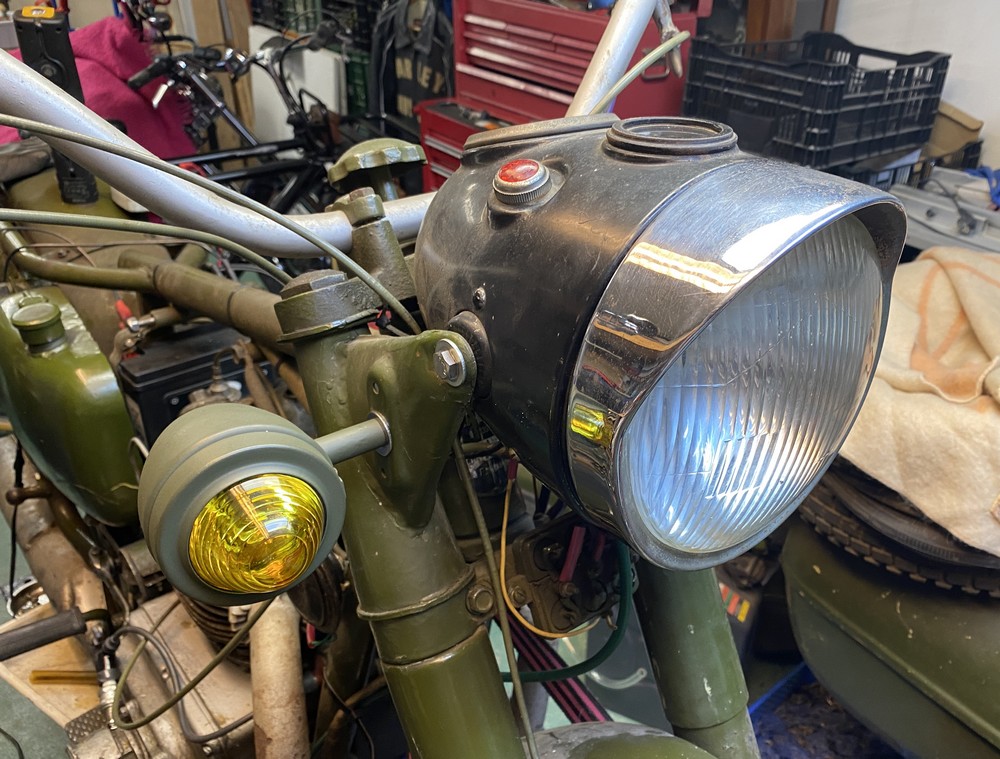
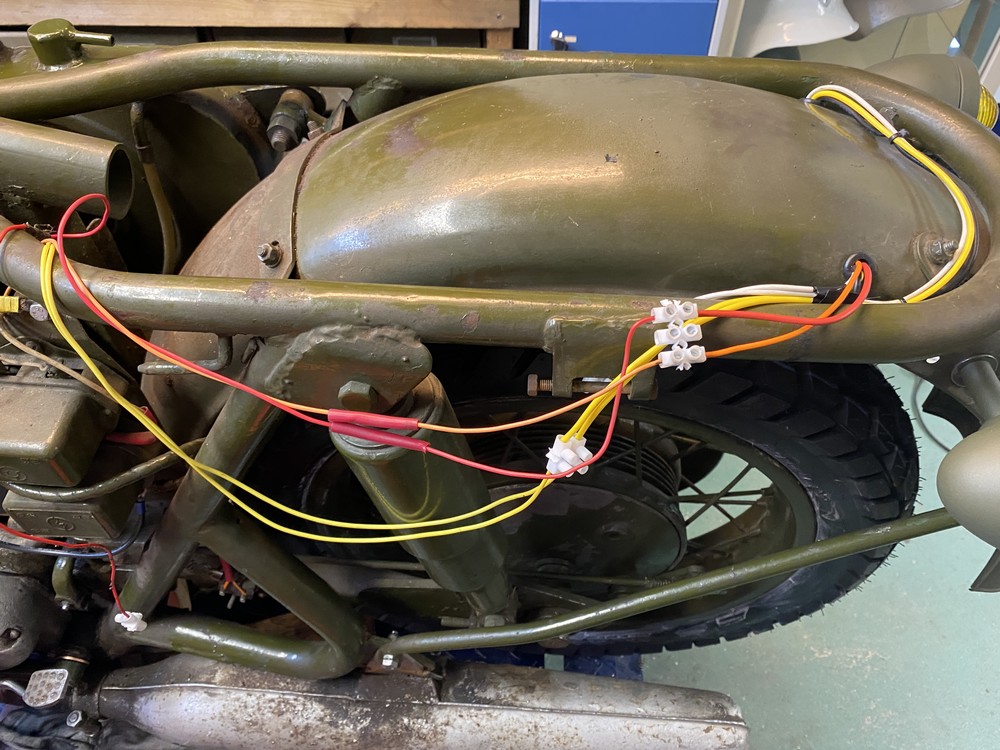
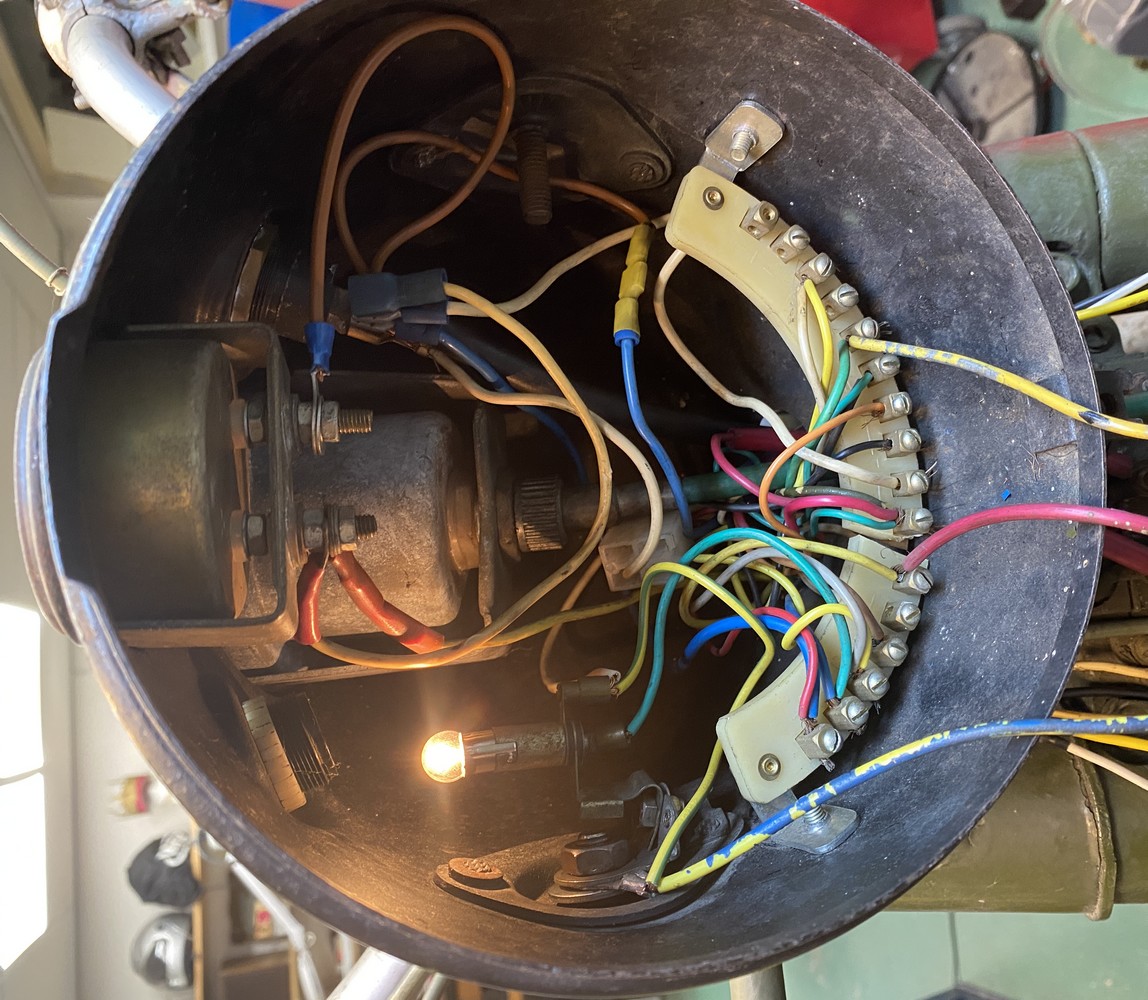
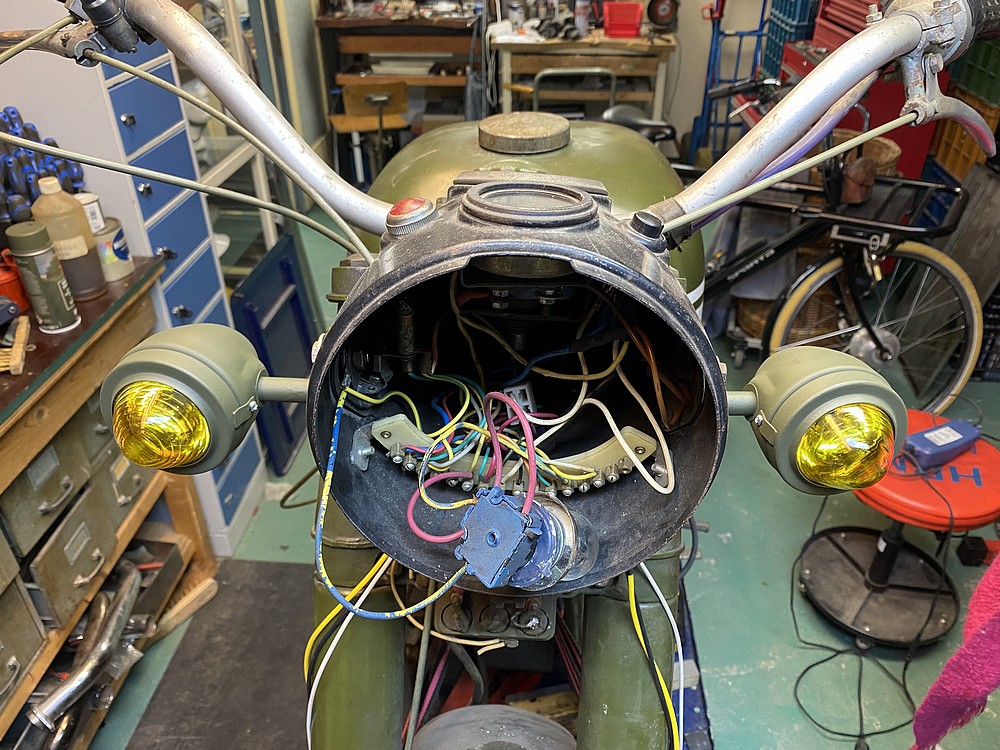
| 8-4-24: Today I celebrate the victory of my greatest enemy; the wiring of an old motorcycle. All lights and lamps work. Parking lights, low beam, high beam, brake lights and indicators. It was smart to replace the mirror in the headlight with a new one. The starter had also given up hope, but after a few good taps on the relay it got back to what it was made for. Next project: clutch lever. | ||
 | ||
 | ||
| 1-4-24: It's no joke, but most of the wiring has been concealed. The headlight surround is the only piece of chrome on the bike. But there is always something. All the lamps I have do not fit in the socket. So looking for the true one....... | ||
 | ||
| 31-3-24: Wolf Alice sings in her song The Last Man on Earth: "let the light shine on you". that was exactly the moment when all the lights on the engine were working. Now I need to hide some wires in the headlight and look for another relay. | ||
 | ||
| 30-3-24: Today I messed around with the wires again. The rear light and brake light now work properly, but the indicators still refuse to cooperate. Don't get more than 6 volts on the lights. I cleaned the relay but I'm afraid it no longer works. I also have my reservations about the handlebar switch. luckily I have a new one lying around. | ||
 | ||
 | ||
| 29-3-24: Wires, wires and more wires. Many people have been tinkering with the bike since 1980. So I measured each wire one by one and made some adjustments here and there. Now the rear light is on and the brake light is also doing what it should do. The white plugs are of course temporary. | ||
 | ||
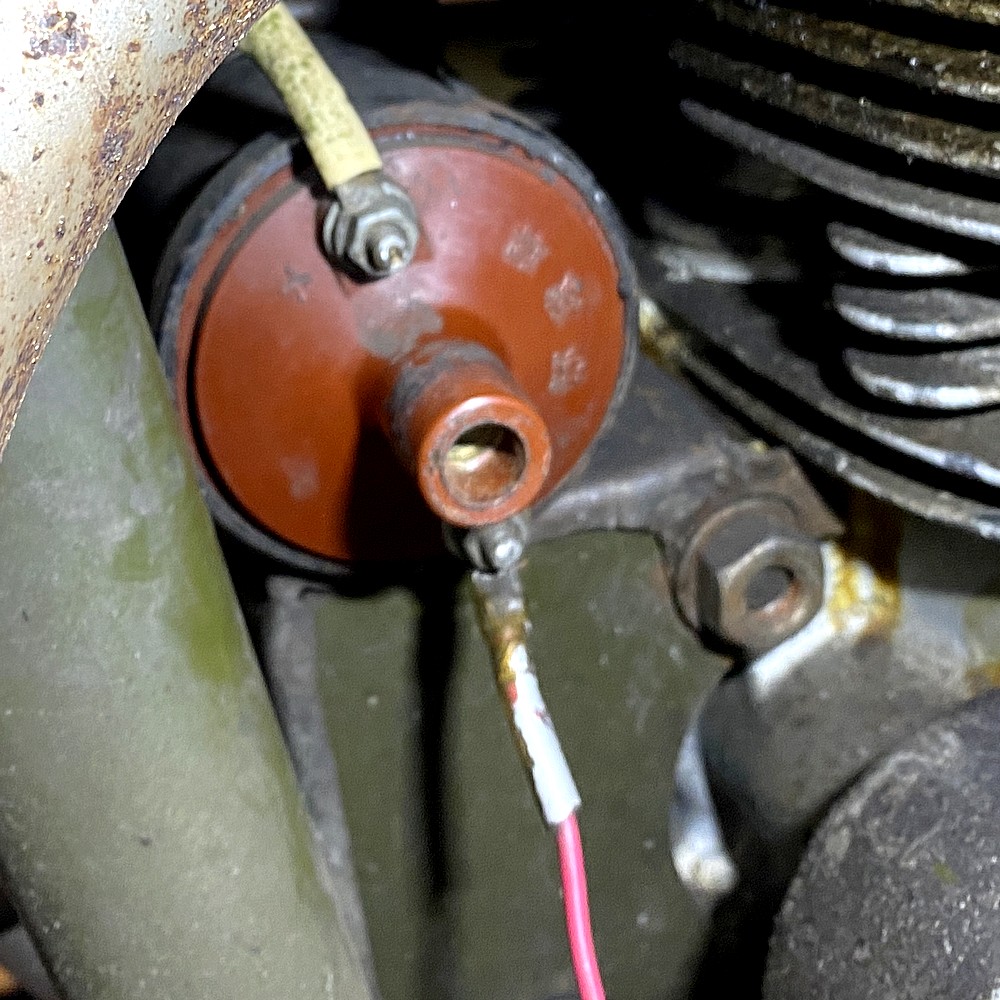
| 25-3-24: Just check the oil pressure sensor and the light will come on. Not so. I measured everything ten times until I discovered that the wire to the censor had no "ground". Thing was taken down again and completely checked. | ||
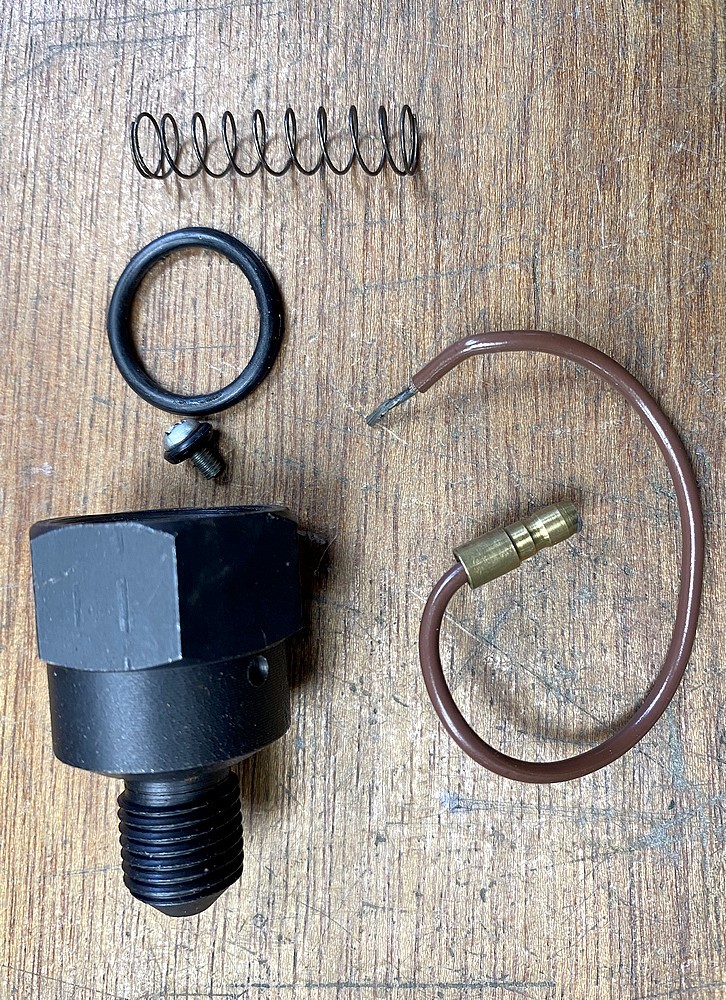 | ||
| Finally I looked at the manual and discovered that a small part was missing. There should be a bushing attached to the spring that sits against the little screw in the middel. When oil pressure builds up, the pressure causes the bushing to release from the screw, causing the light to go out. | ||
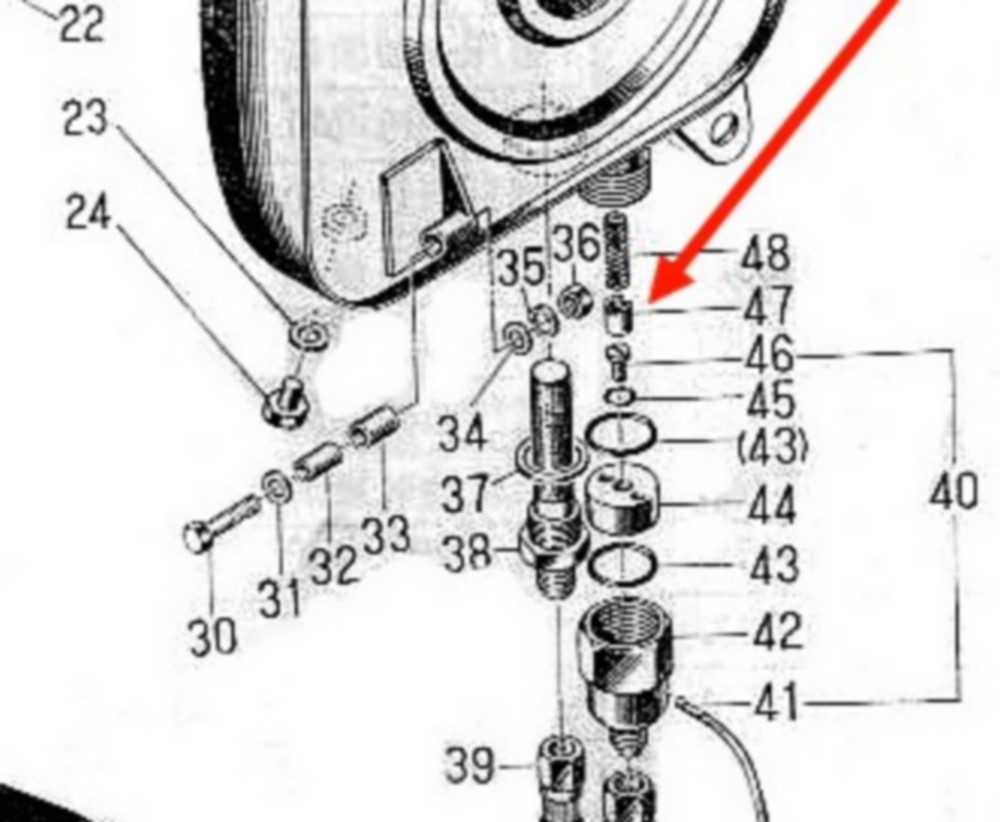 | ||
| 24-3-24: Installed the pressure sensor today. This time with a wire. It is not yet entirely clear where that wire should go. Although I do have a suspicion about that. As far as I understand it, this switch cuts off the ground when the oil pressure is sufficient. | ||
 | ||
| Only the light was not on. The quickest solution was to look for another lamp. I always keep everything so after some searching it came rolling out of a box. In any case, it provides light. | ||
 | ||
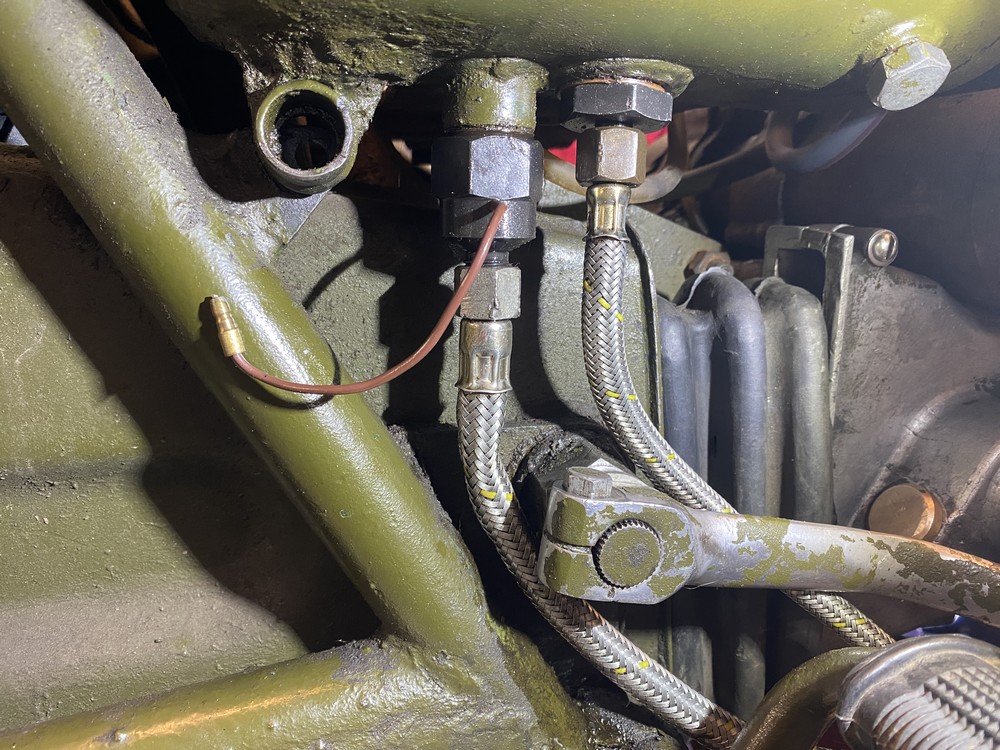
| 23-3-24: Today it was the odometer cable's turn. That wasn't easy, but in the end he fit in between the oil lines. Maybe the cable gets too hot there and I will have to reroute the oil lines. I forgot to check if the counter was working. Will come another time. | ||
 | ||
 | ||
| 20-3-24: There's nothing more fun than assembling hard-to-find parts that fit perfectly. I added a soft copper ring on the left side because the teeth were worn out. Really stuck now. I haven't found the time or inclination yet to make the entire engine free of grease. It'll come. It will not become a museum piece. | ||
 | ||
 | ||
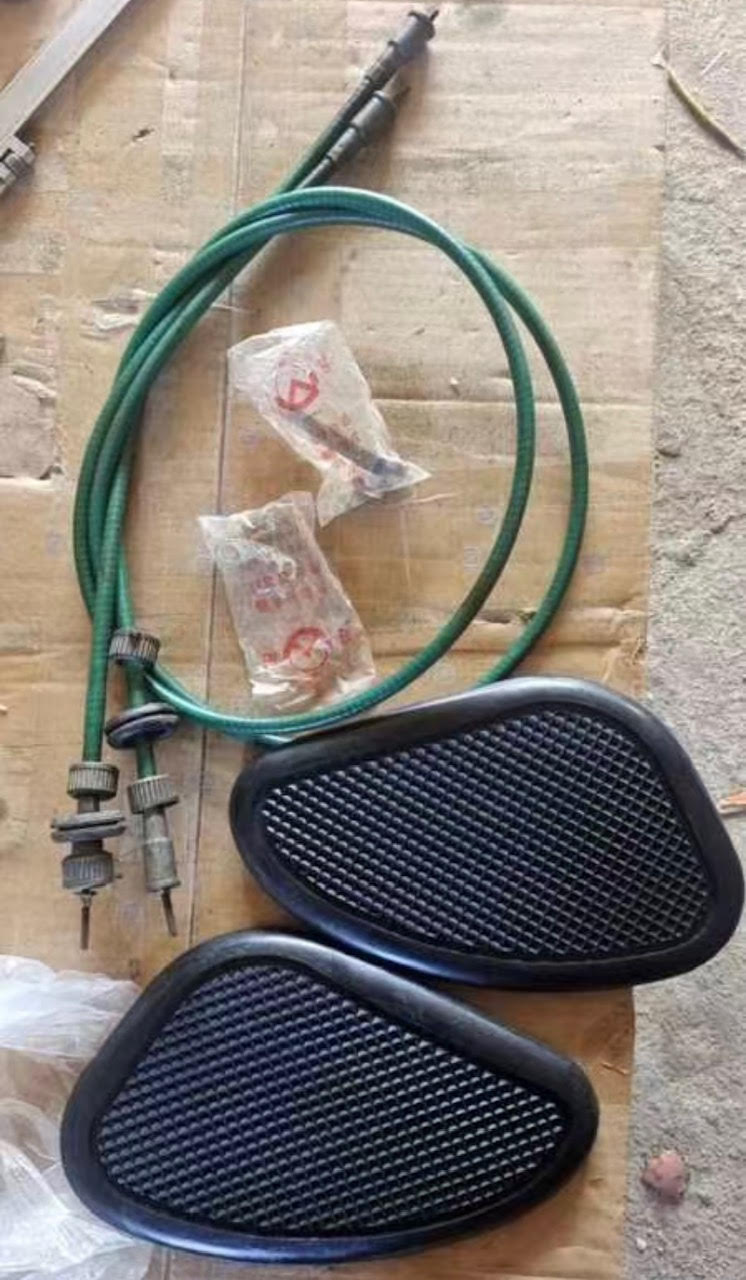
| 19-3-24: some parts arrived. | ||
 | ||
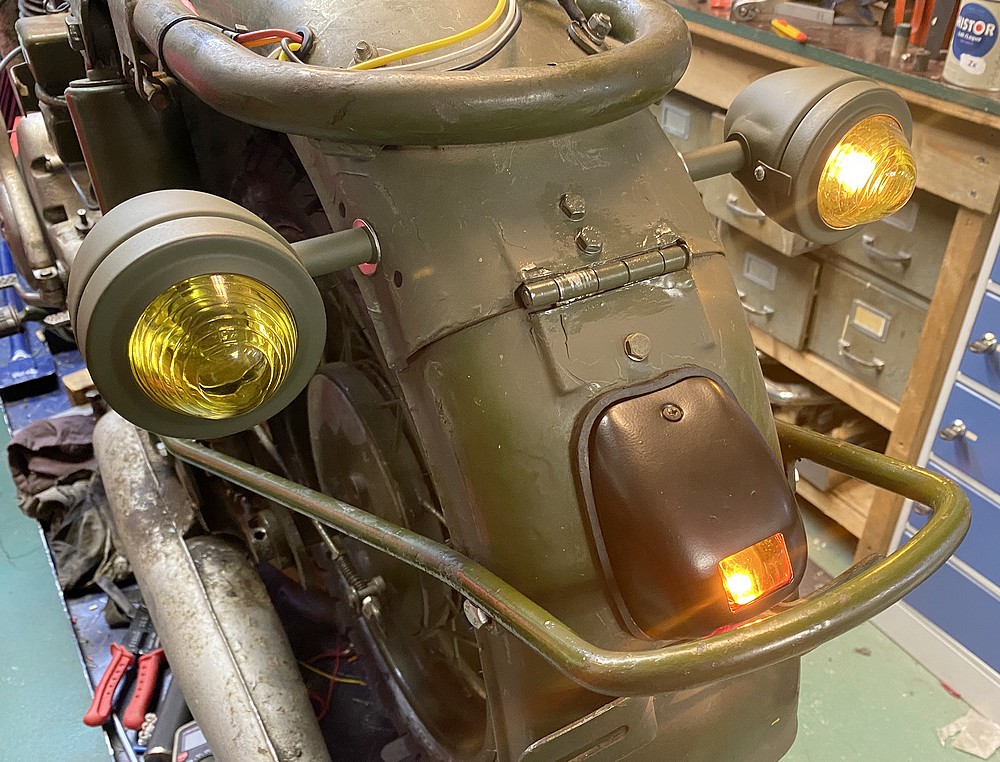
| 9-3-24: There are thousands of other jobs to be done, but today the indicator lights arrived from China and of course they had to be put on. Are they beautiful? Not really. | ||
 | ||
 | ||
 | ||
| 8-3-24: Finally word from China that some parts have been found. Now just have to get it to the Netherlands. | ||
 | ||
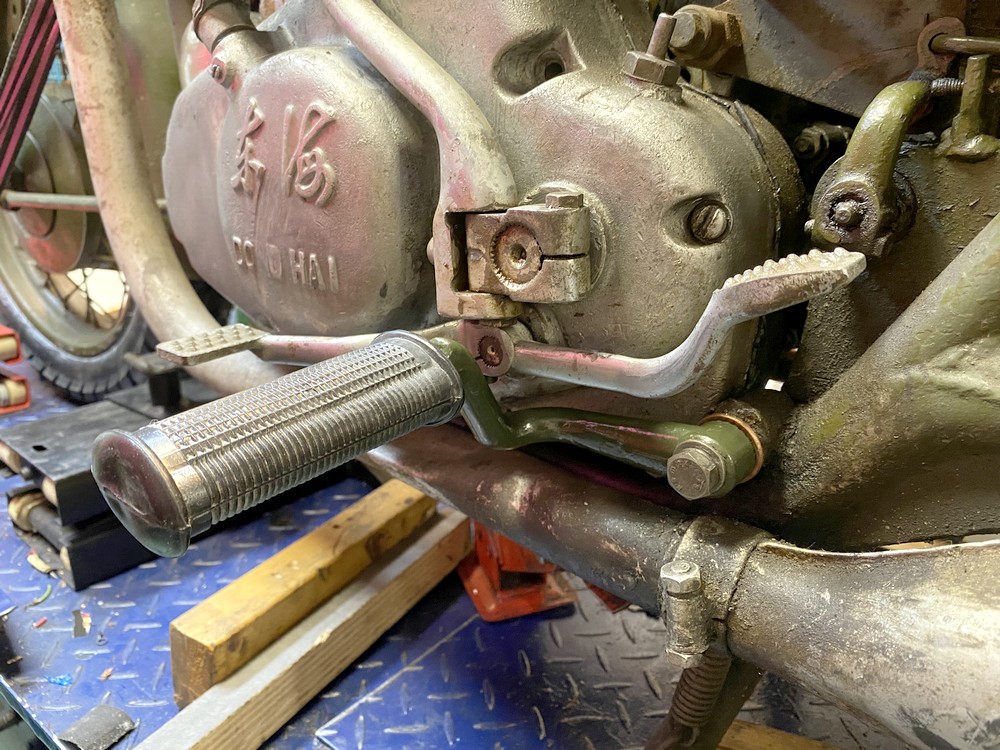
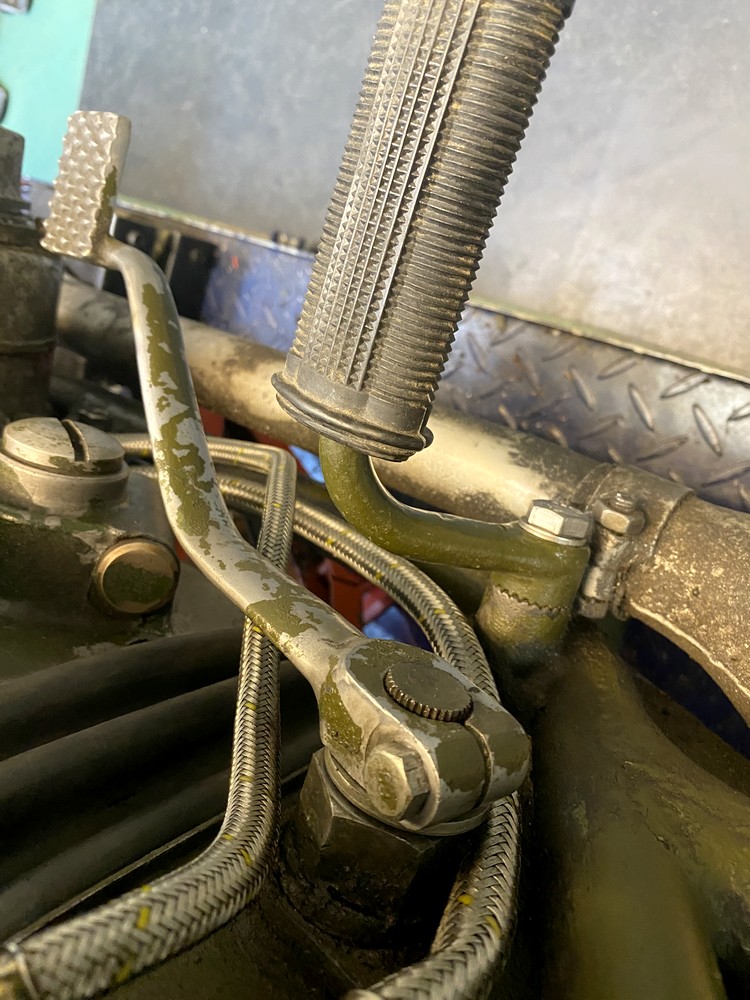
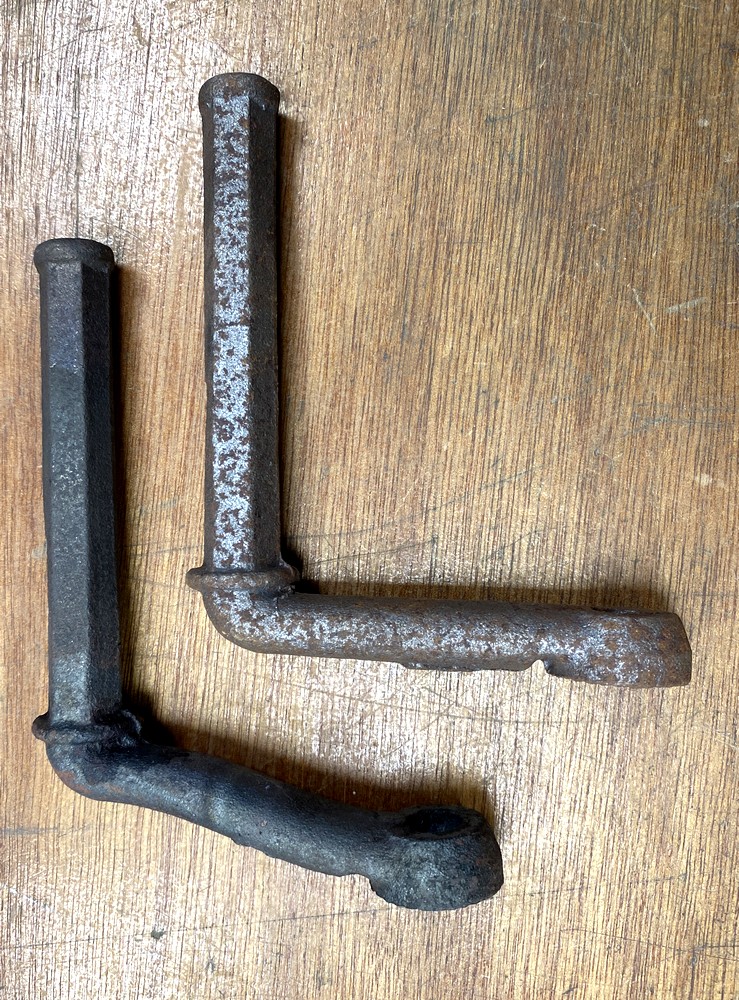
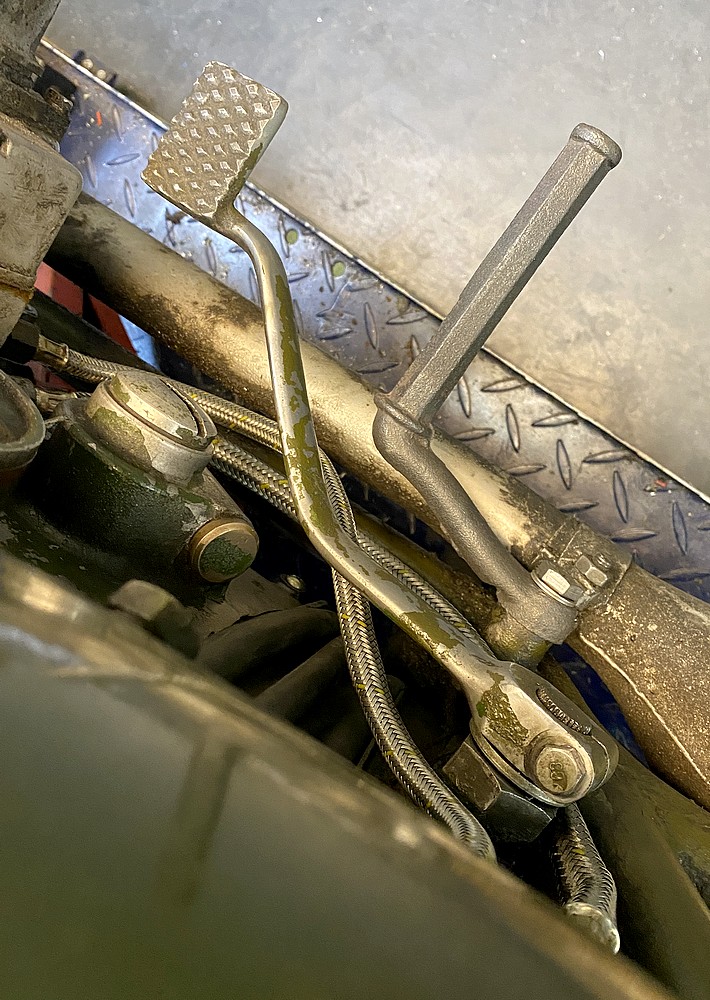
| 29-2-24: The original footsteps were not present on the bike and I did not want to take them off the other one I have. Those of the Ural and Chang-Jiang were close and with some red-hot adjustment they had a more usable shape. Now the gear lever and brake pedal no longer hit them. On the right the original and on the left the modified one. | ||
 | ||
 | ||
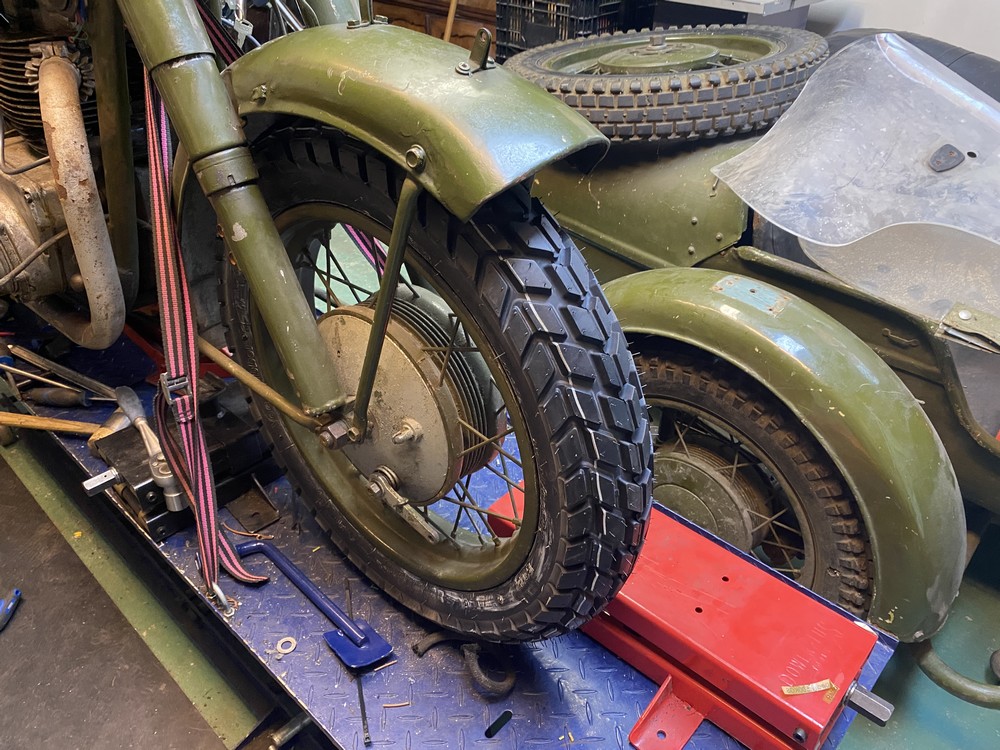
| 16-2-24: The original tires had now turned into concrete and had to be replaced. That wasn't easy. The size is 400x17 but they cannot be found. So decided to buy 110/90 x 17. | ||
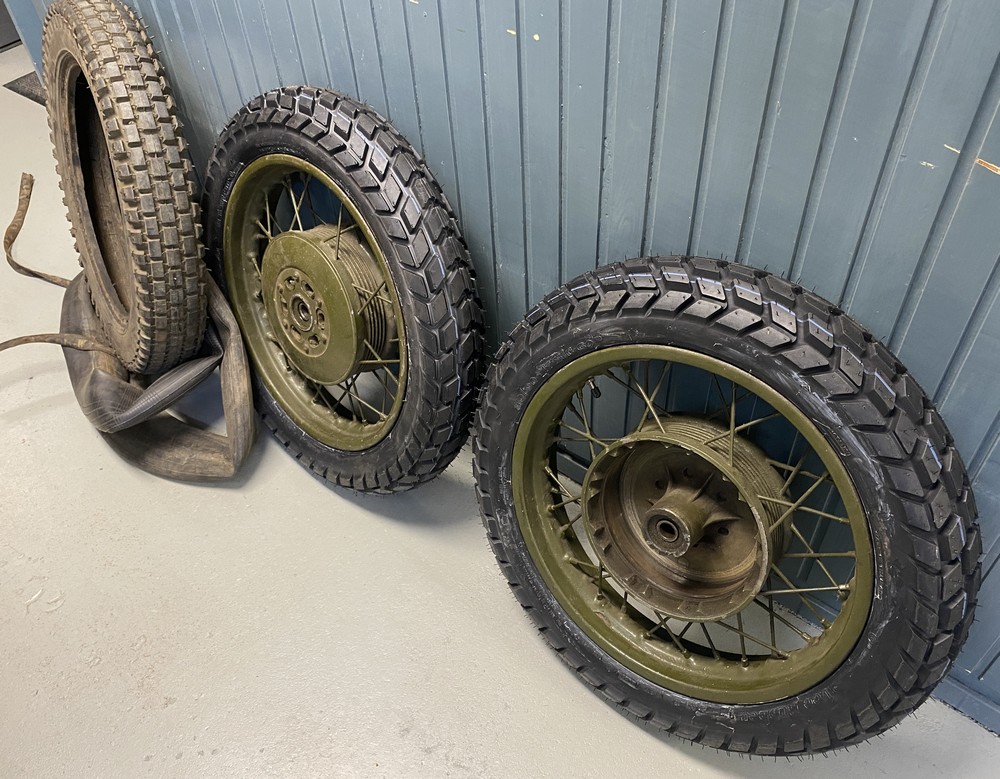 | ||
| These are excellent tires with a nice profile that suits the motorcycle very well. They just seem a bit awkward. The outer circumference is somewhat smaller than the original tires. For a solo motorcycle it is wiser not to choose those "square" tires. | ||
 | ||
| 15-2-24: A few years ago there was a site called "donghaiunlimited.com" (Clay Jones) but it no longer exists. Fortunately, there are sites that preserve everything that has ever been on the internet and after some searching I found that site. I downloaded and updated all drawings to create a parts manual. Further supplemented with documentation that I had found in the meantime. Hope that you find it useful. Just tap on the photo to go to the catalog page. | ||
 | ||
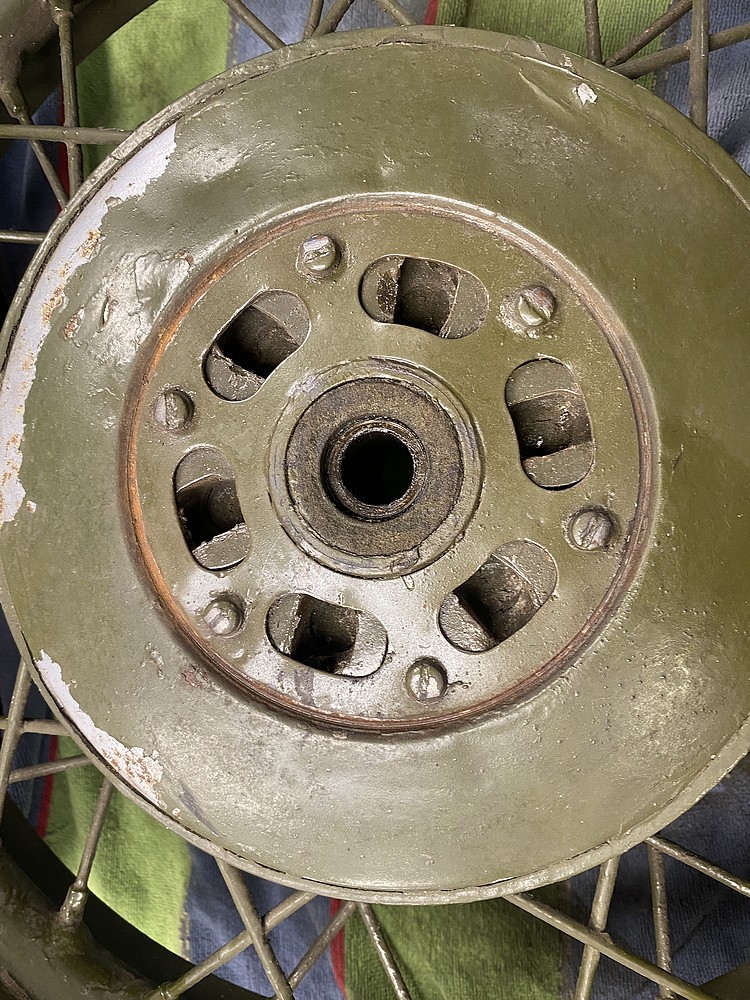
| 14-2-24: The right color cannot be found. I had part of it scanned, but that yielded the wrong color, so I'll keep looking. Below is the hub and it can clearly be seen that there are rubber shock absorbers for the rear wheel. I'll let this one sit until I can find new ones. By the way, all four wheels are interchangeable. | ||
 | ||
| The original Chinese tires are still on it. Unfortunately, they are no longer usable because they are completely full of small cracks. Not something to drive. But a beautiful inscription. | ||
 | ||
| On the right side there is a bronze threaded bushing with nothing mounted on it. What would that be for now? | ||
 | ||
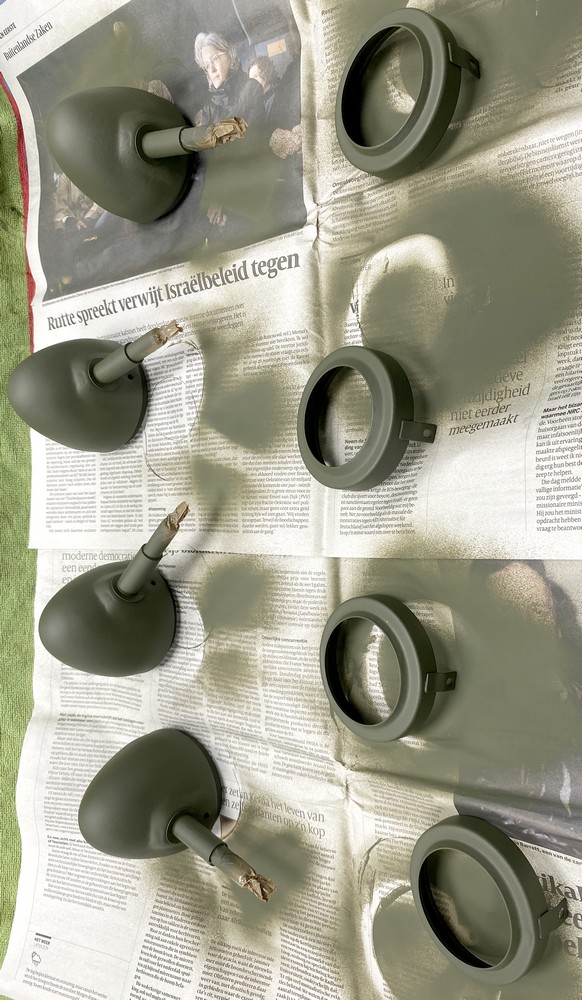
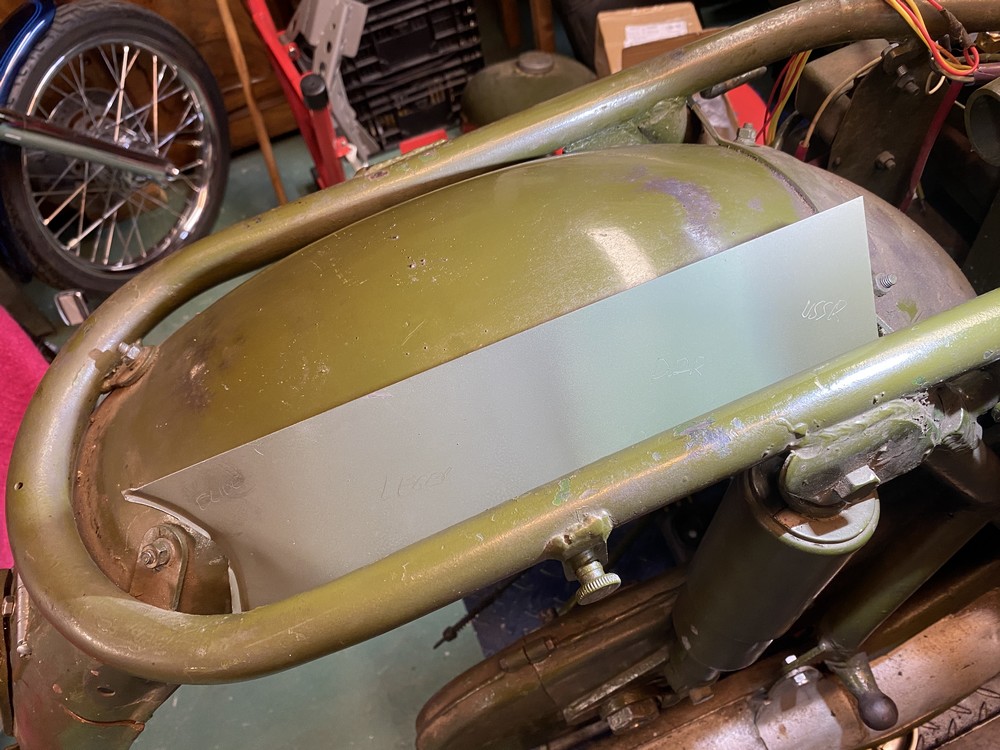
| 10-02-24: Looking for the color and that is not easy. There are already many different shades of green on the motorcycle. Actually it doesn't matter that much because I'm not restoring it. It stays that way, rust and all. | ||
 | ||
| Luckily I had some different colors of army paint at home, but none are really the same. Most army colors are also matte. Photo below from right to left. USSR, GDR, Dutch army and Olive drap. The latter comes close. Going to the paint store this week. | ||
 | ||
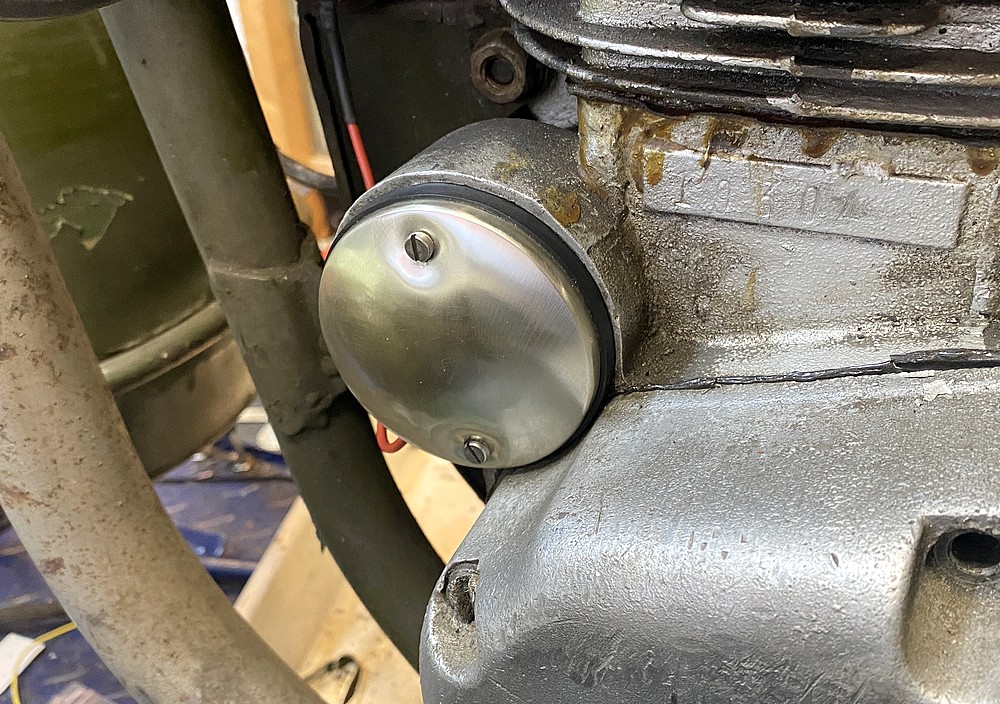
| 7-2-24: Sometimes a part is missing. Usually they can no longer be localized. There is only one thing left: make it yourself. So it happened. It took a little more time than expected. Immediately provided with a rubber sealing edge, which the original did not have. | ||
 | ||
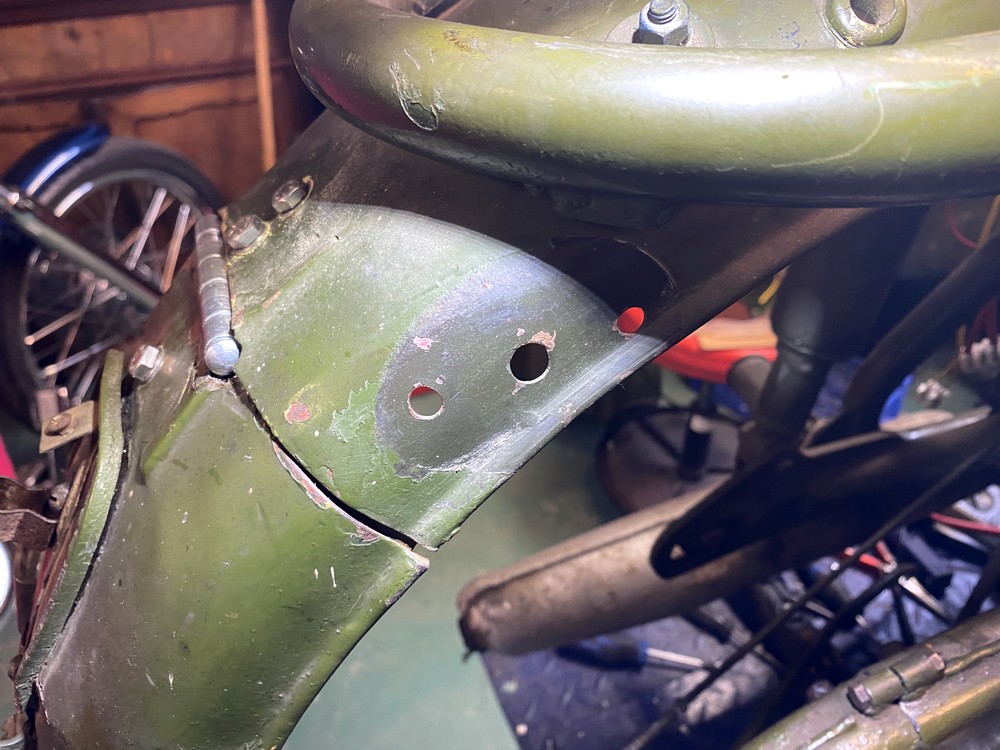
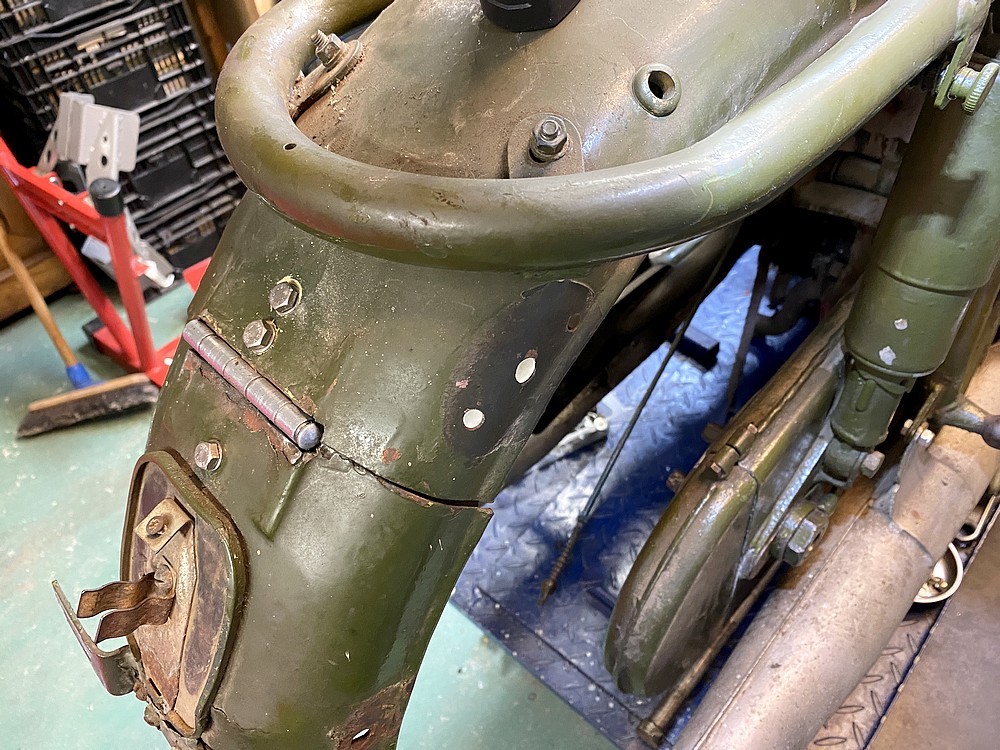
| 4-2-24: I discovered that there are two types of rear fenders. A fixed mudguard and a divided mudguard. When dismantling to remove the wheel, it turned out that the hinge was no longer usable. The solution turned out not to be simple. Just try to find a hinge with the same dimensions. | ||
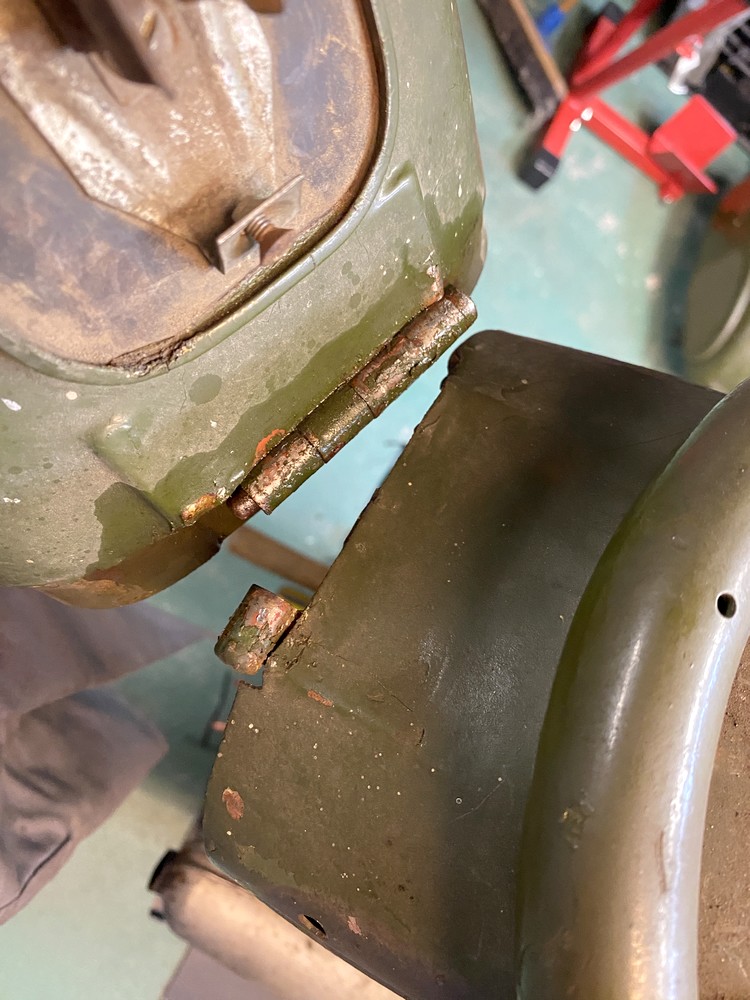 | ||
| Now that turned out to be no problem at all. These are the same as the hinges that are normally used in the doors here. I did have to adjust it. Assembly was a lot more difficult. The original is clamped between two plates that can no longer be released. Only the back part worked. Ultimately I decided to secure both parts with small bolts. If a color comes over it, you can hardly see it anymore. | ||
 | ||
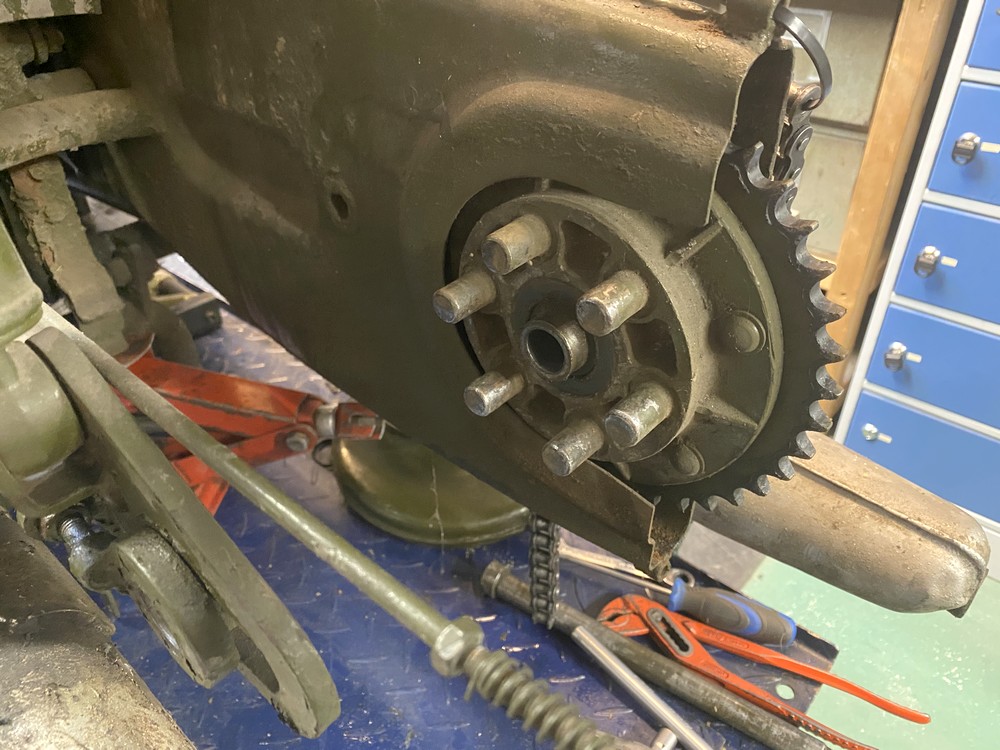
| 1-2-24: So I made a mistake by opening the chain guard and the chain rolled into it. Mistake because I didn't know the rear wheel could be removed without removing the chain. The front sprocket runs behind this beautiful cover plate and through the rubber. | ||
 | ||
| After a lot of fiddling and trying all the tricks, the front sprocket got completely stuck. Can't get any more movement. | ||
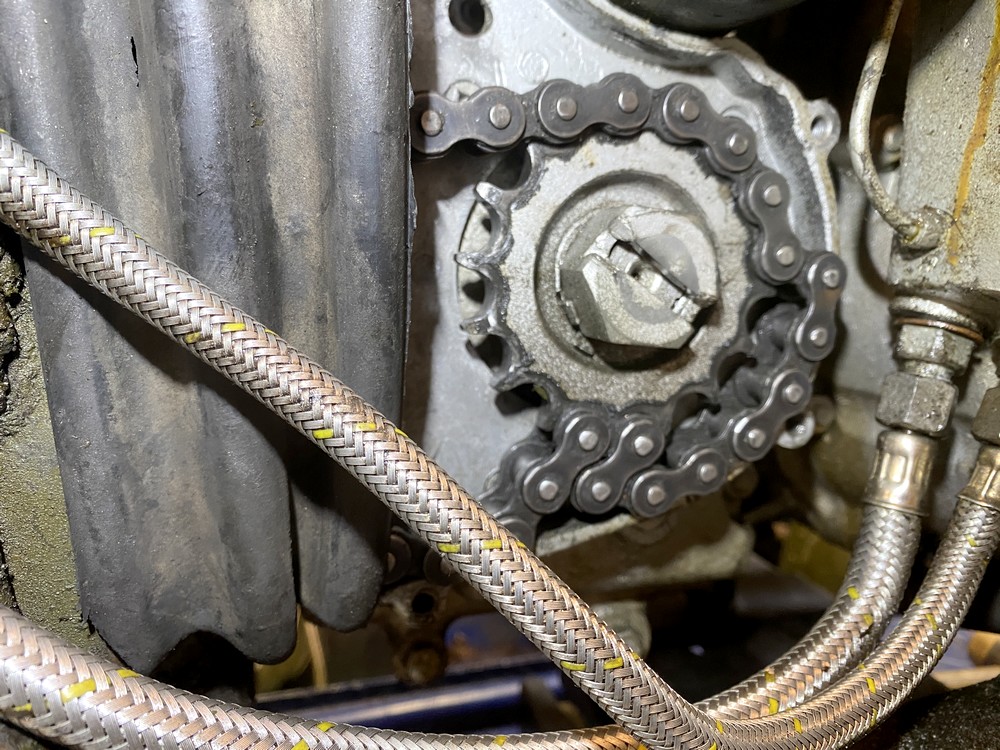 | ||
| Finally I took the cover off and then I got it in between everything. I expected a few liters of oil but it didn't come. It was a bit of precision work. And so I was able to get the chain back to the rear sprocket. Just put it in some grease and tighten it. | ||
 | ||
| 31-1-24: The factory's original intention was to be able to completely disassemble the engine using the on-board tools. I'm curious what that set will look like. Many different tools were needed to remove the rear wheel. The chain runs through a large steel protective case that ensures that the chain and sprockets do not wear out so quickly. Unfortunately the chain came off the front sprocket, but we will see how we can solve that. | ||
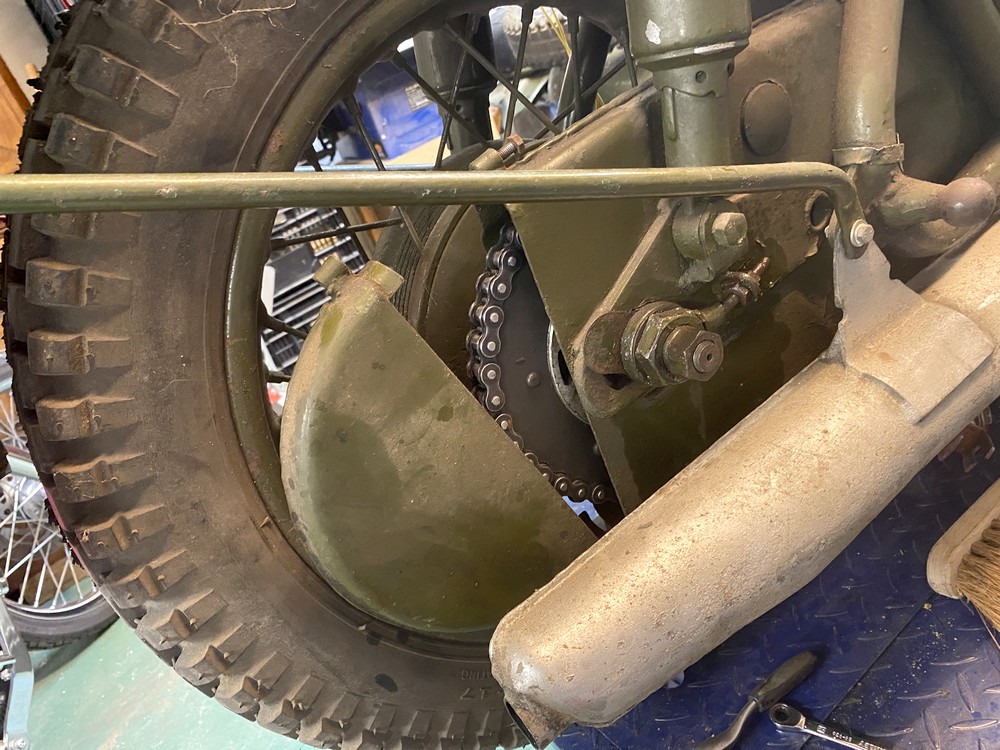 | ||
| The tire still seems fine, but in reality it is completely covered in small cracks. So it will be replaced as well as the front tire. Unfortunately, the size 400/17 is no longer available for a decent price, so slightly different tires are available. See if that will work. The rear wheel falls into a plate with 6 pins so that disassembly is easy and the chain can remain in place. But I didn't know that. This way you learn something every day. | ||
 | ||
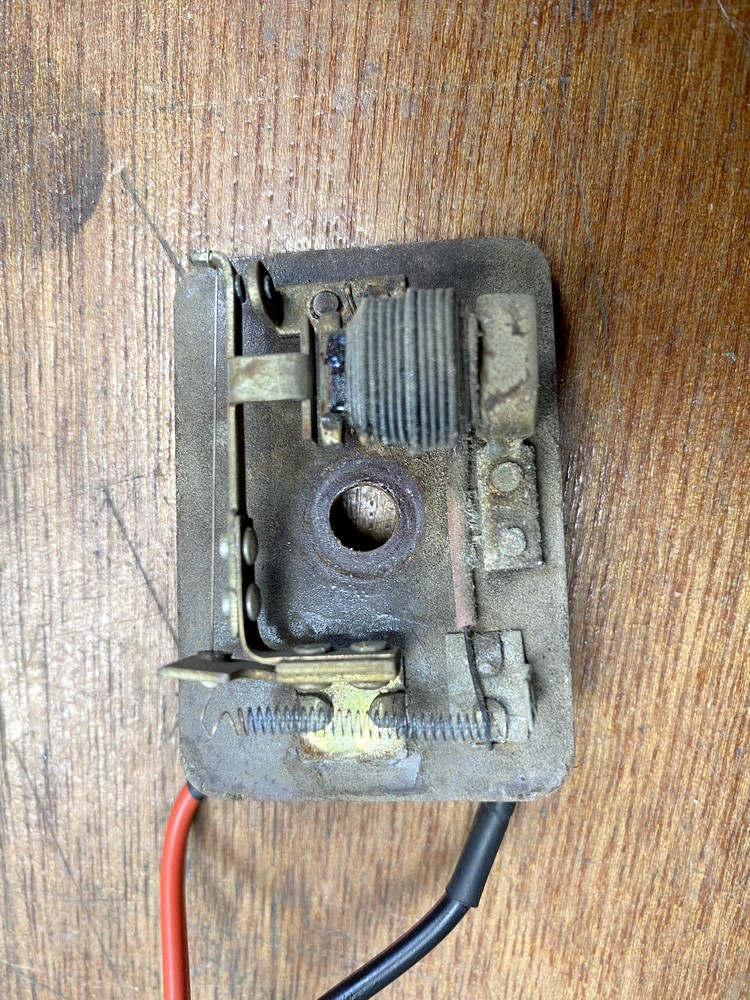
| 26-01-24: Today the tank was properly secured in rubber and the original tipper light relay emerged. I already missed it but now I can do something with it. | ||
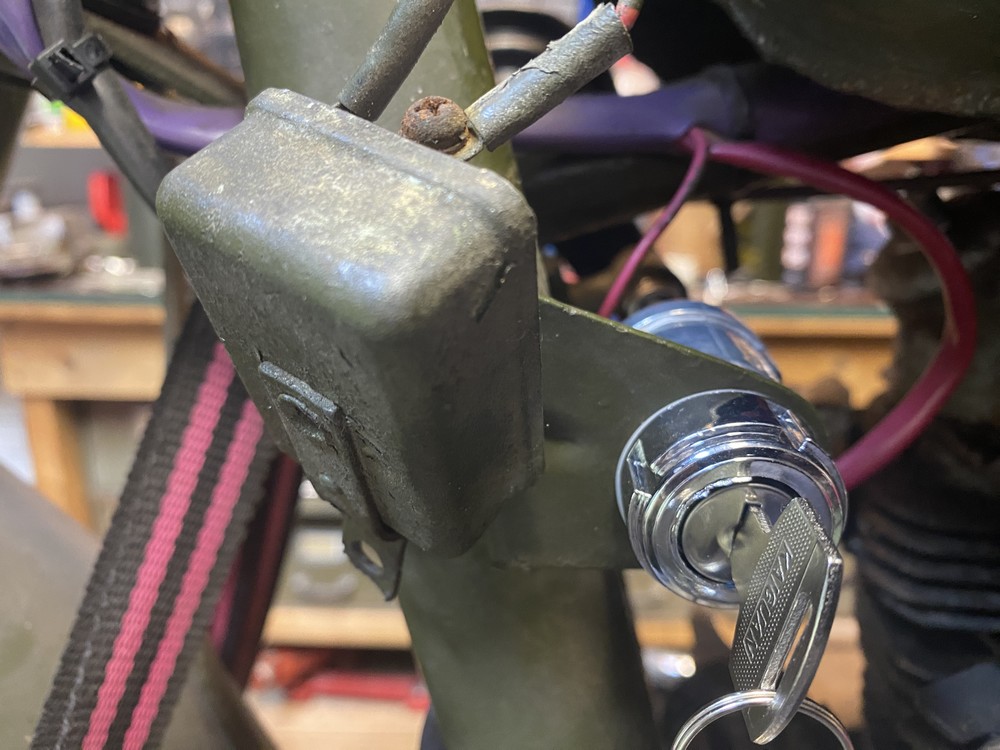 | ||
| 24-1-24: I got the engine running but couldn't find anywhere how to turn it off. Quickly loosen the -pole. Fortunately I had an acquisition from Alie lying around and installed it. It took some searching because those wires are not my strong suit. | ||
 | ||
| 21-1-24: When I went to remove the tank I saw that it was half full of clear gasoline. So it didn't need to be cleaned and I could leave it alone for the time being. After cleaning the carburetor and putting in some new gaskets I thought: why not. Put in the new battery and pressed the start button. Just look what happened when you tap the photo. | ||
 | ||
| 21-1-24: Everything starts with seeing if we can conjure up a spark from the block. After purchasing an expensive 12 volt battery with 23 amp, new cables were made and carefully measured. Put in a few other spark plugs and after some fiddling with the contact points there were suddenly sparks. Bingo. | ||
 | ||
 | ||
 | ||
| 16-1-24: Then some more pictures for the enthusiasts, if there are any. Below is the dreaded alternator that usually doesn't work. We will see. | ||
 | ||
| The headset plate provides a lot of information, provided you can read and understand the language. But the internet gives away a lot of information. | ||
 | ||
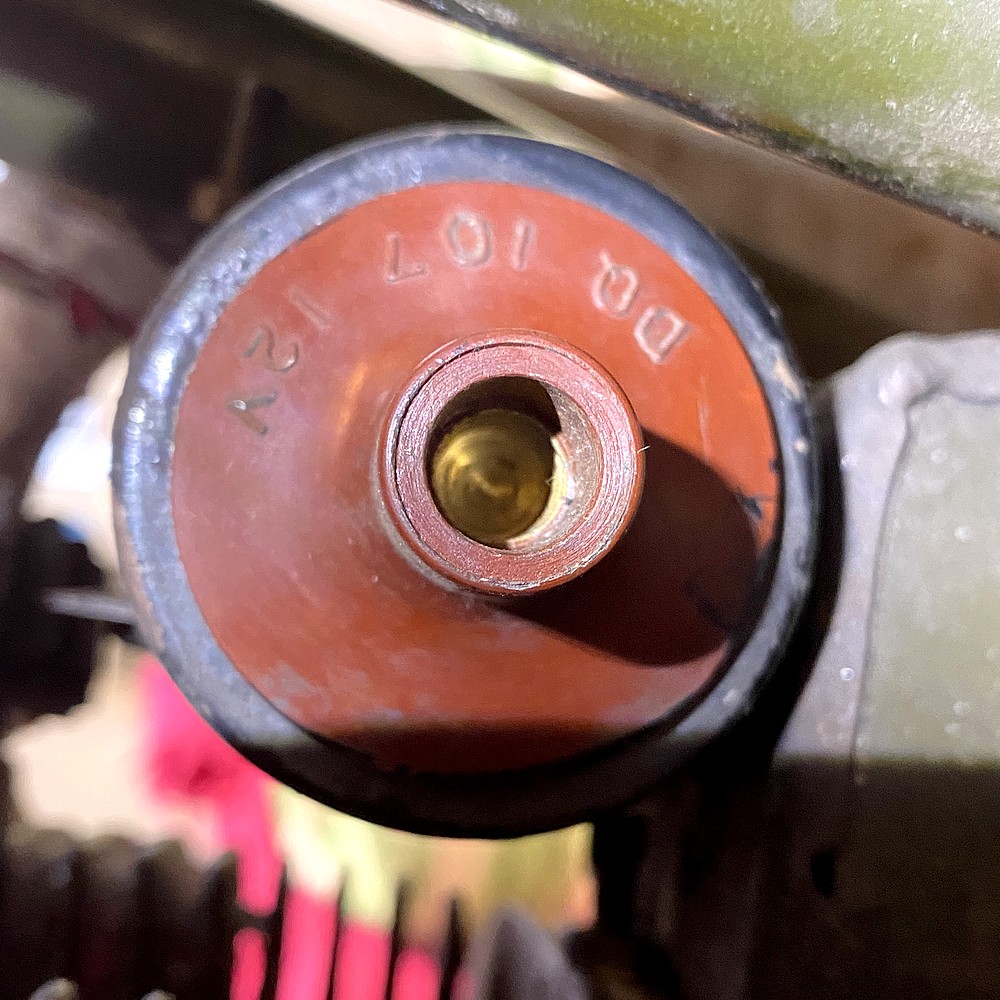
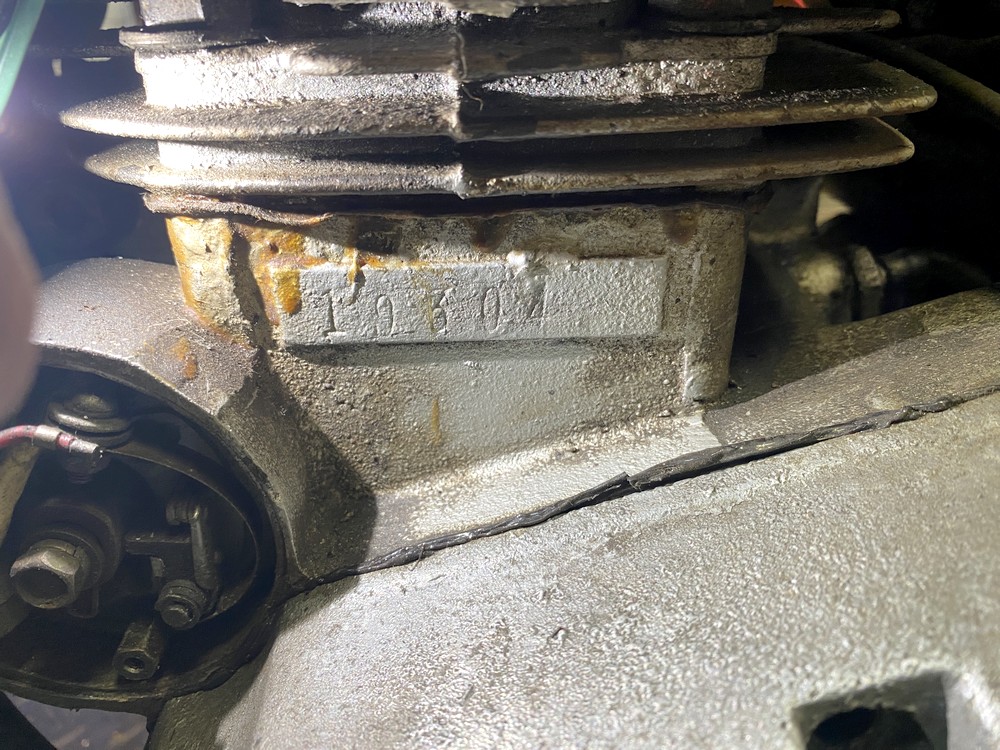
| The number on the crankcase is not the same as the frame number. That was not a custom at the time. 746 is the engine capacity. 22/5100 seems to be the maximum power and speed. 390 is the curb weight, 18595 is the frame number, 80 (Nián) is the year of manufacture 1980 and 6 (Yué) is the month of June. So we know it is from June 1980. | ||
 | ||
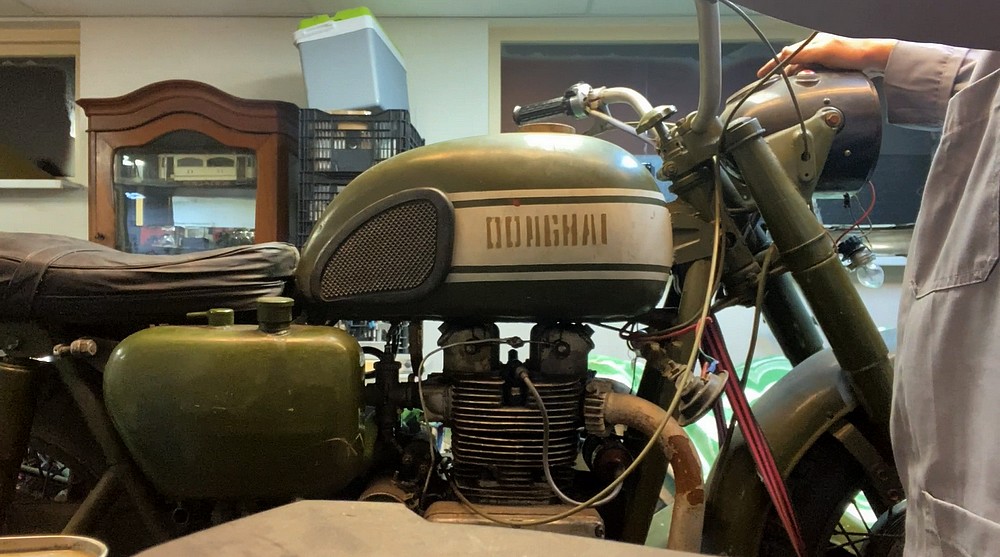
| 14-1-24: A first impression of the Donghai. Just look through the dirt and it will become something beautiful. I want to get the engine running first before I do anything else. With a battery that is too light, the starter motor wants to turn and that is certainly something. Spark plugs are not sparking yet and the problem seems to lie in the ignition coil or contact points. But first some photos for the atmosphere. Also pay attention to the mileage. The wear of the rubber parts shows that this is not correct. | ||
 | ||
| Headlight with counter and nice mileage. Can't be right, but it looks nice. Left button is for the starter motor. Sorry about the dust. | ||
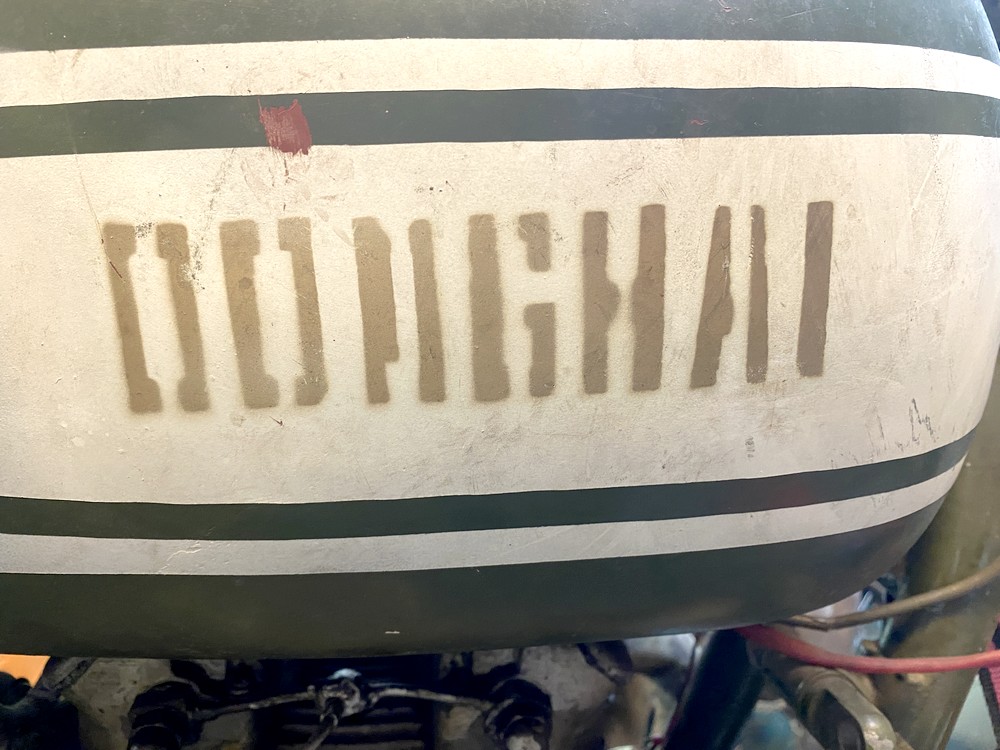 | ||
| Beautiful name on the tank. Simple and unreadable if you don't know it. | ||
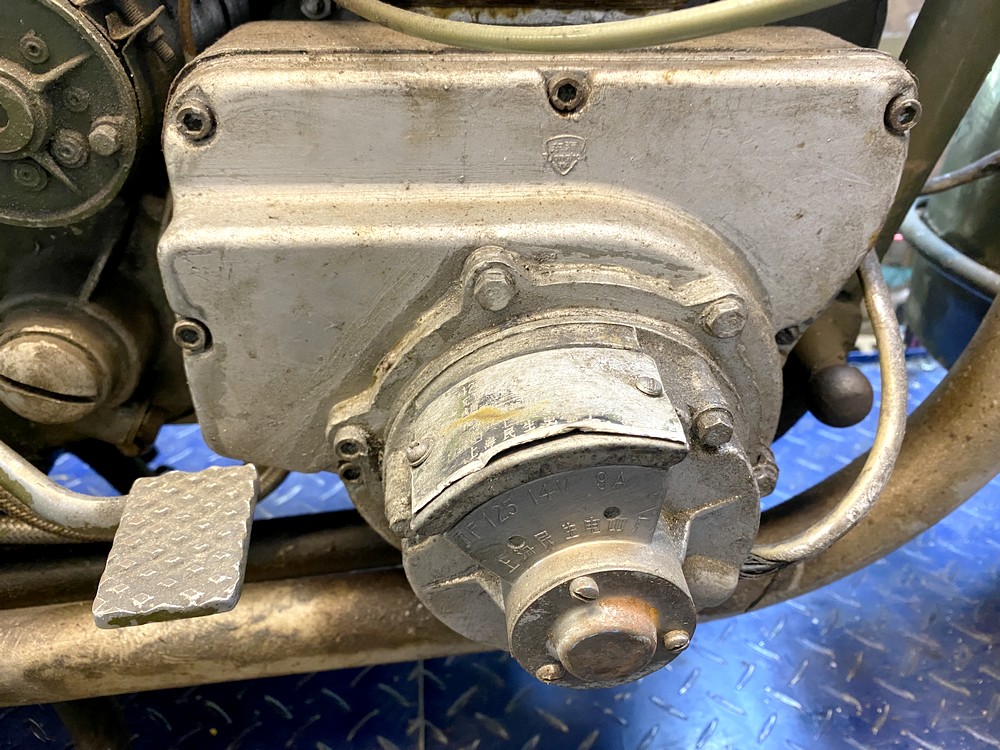 | ||
| Another variant of the dynamo. | ||
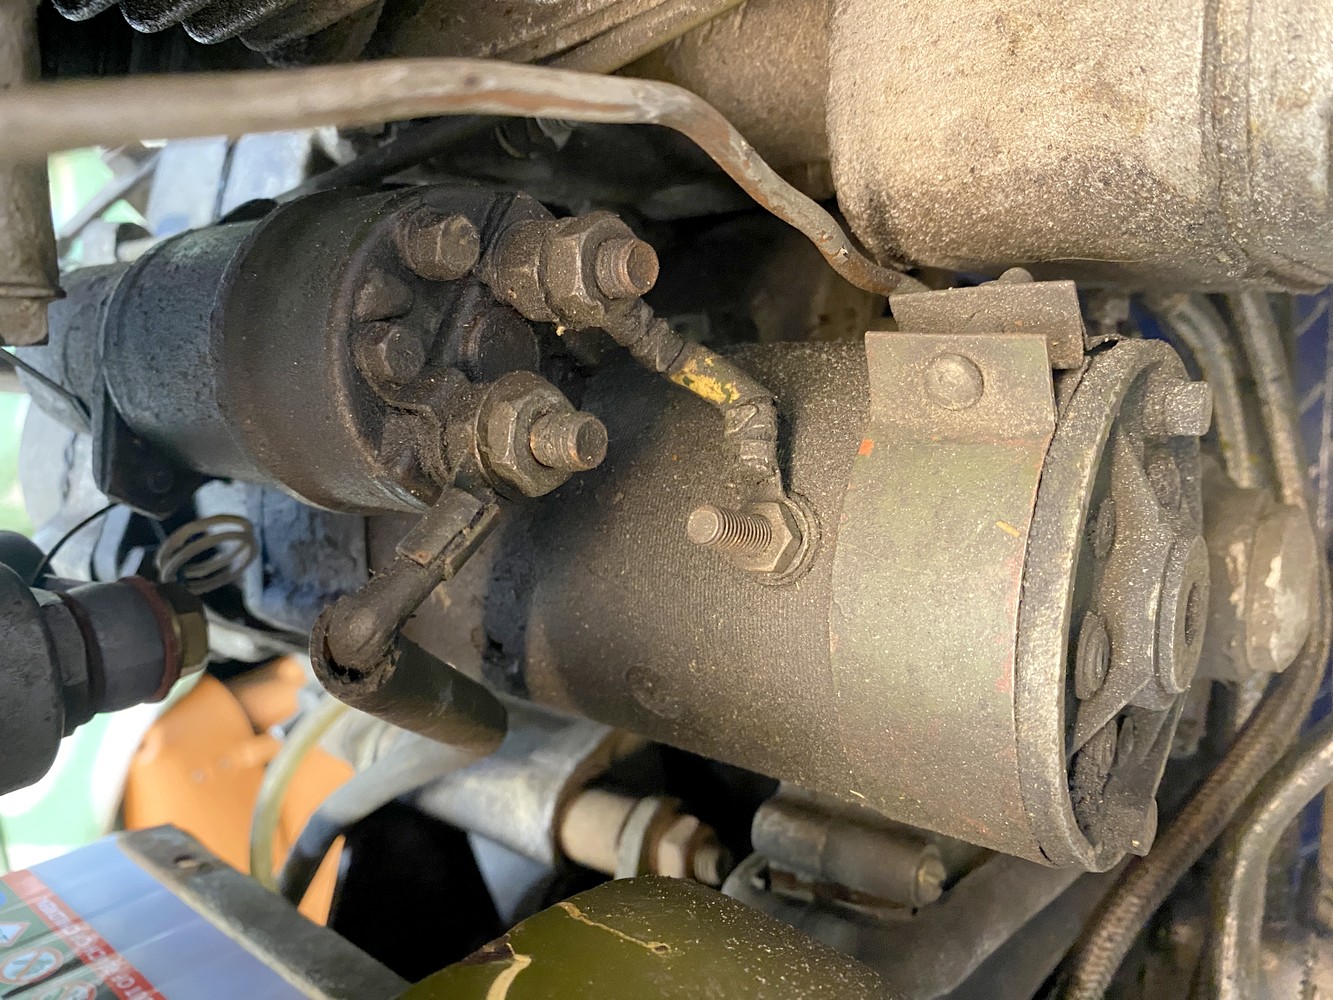 | ||
| The starter motor. | ||
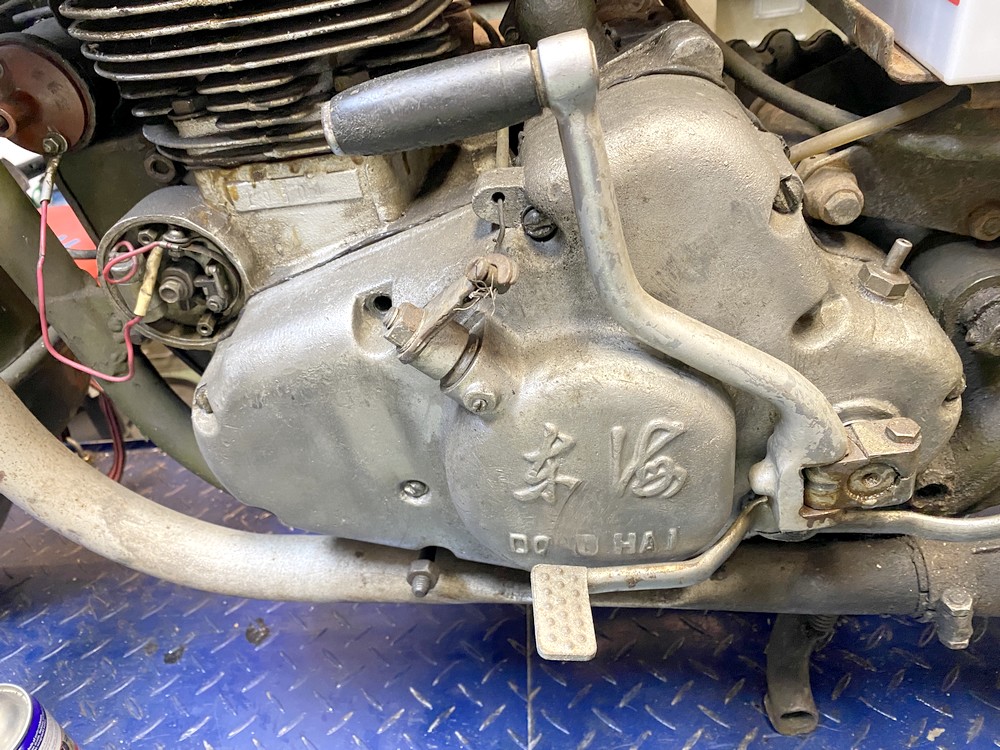 | ||
| Text on the left side. Probably means Don Hai but I couldn't find it. Visible is the clutch lever, kick starter and shift pedal. | ||
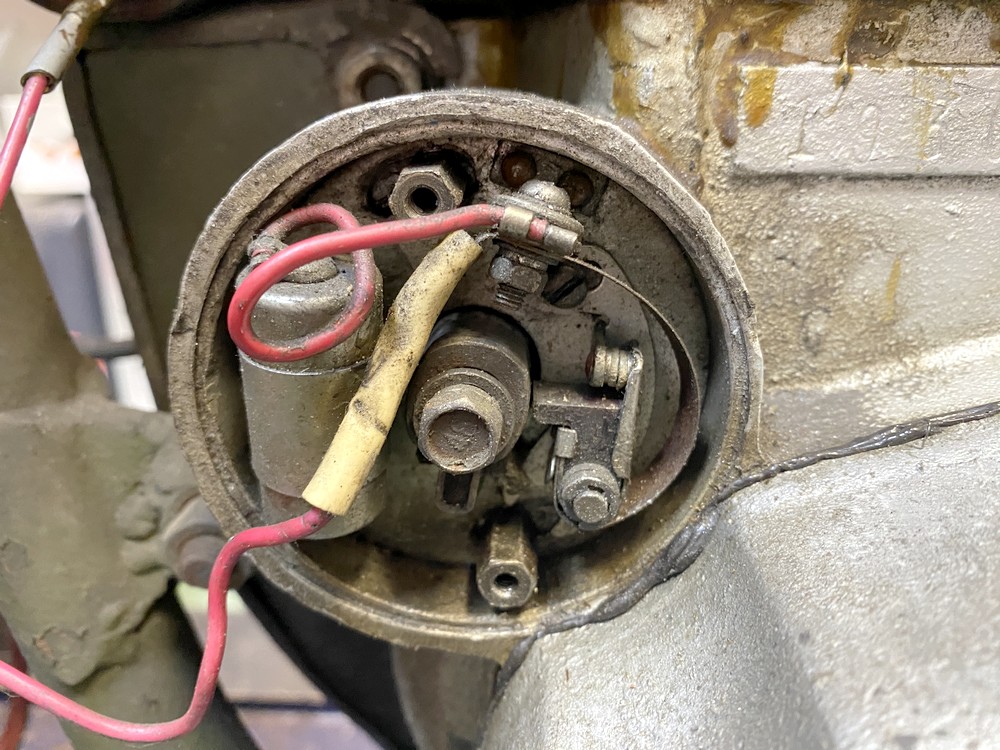 | ||
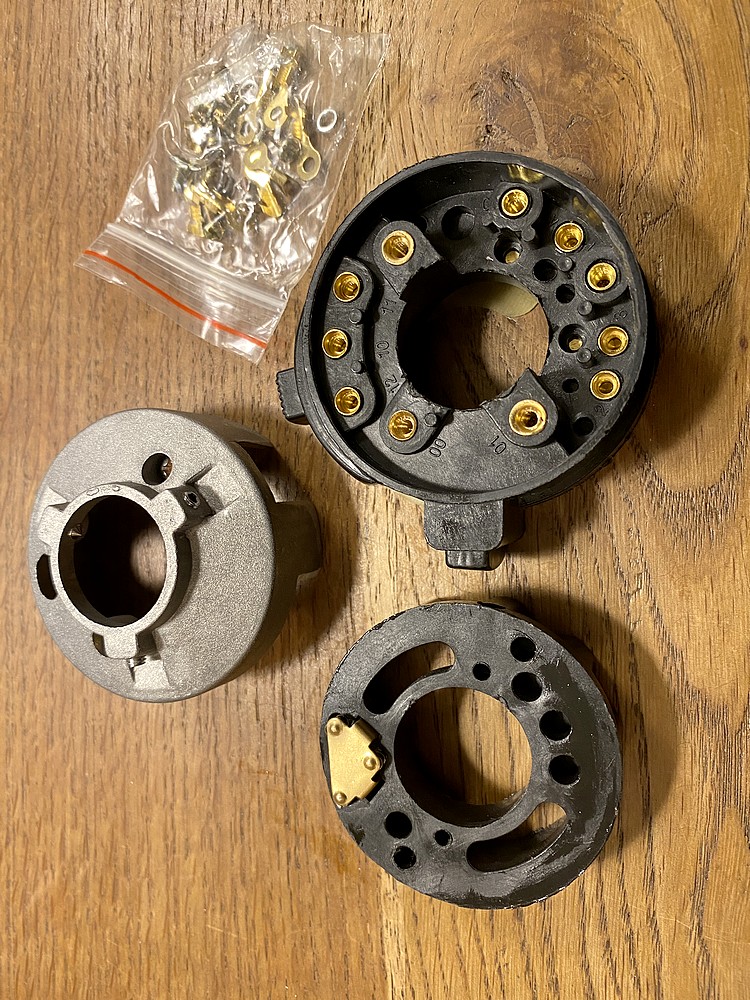
| Contact points and capacitor. Photo below: the fantastic rotary switch that is also on the chang-jiang. | ||
 | ||
| 8-1-24: After hours of searching for information about the Donghai, I saw a link that pointed to a missing page. There is a library in the US where they keep all the pages that have ever been on the internet. At least most of them. There I found the missing page with the history in English. I translated it and placed it at the bottom of this page. Below that is a version from a Chinese site. | ||
 | ||
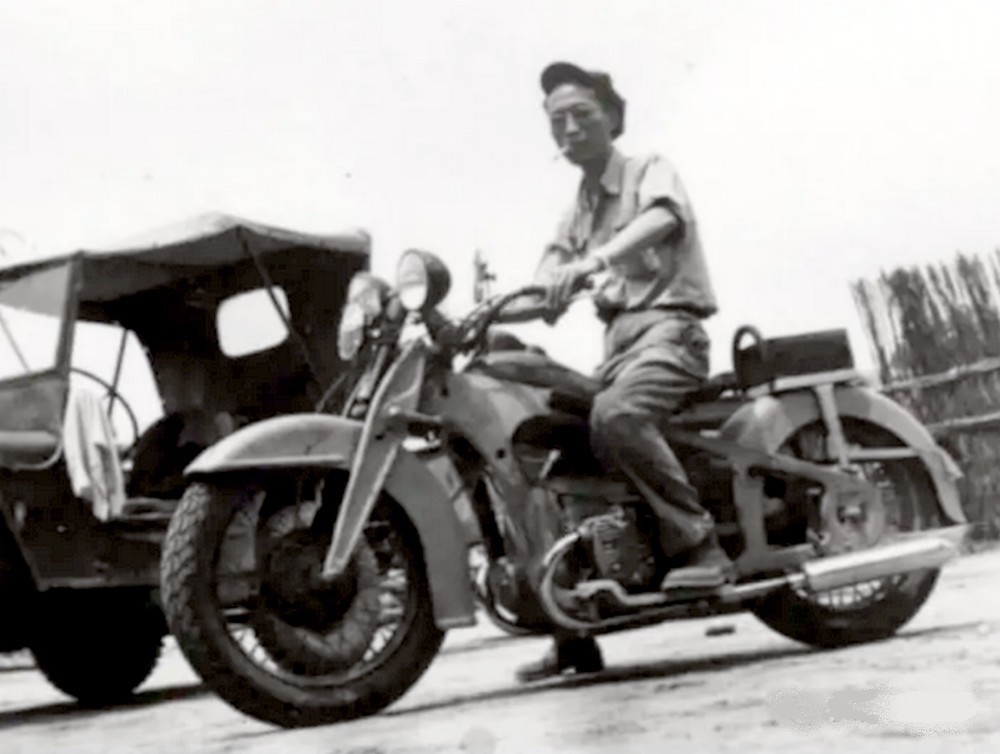
| 7-1-24: Things can move quickly in my manscave. While I was getting through the winter with a (Ural) M72, a very special engine suddenly passed by. A Donghai SM 750. I imagine you don't know it yet. So little is known about it that even the years of construction are a guess. Probably from 1971 to 1984. In fact, I came across two. | ||
 | ||
 | ||
|
Iets heel anders: Tijdens mijn zoektocht naar informatie over de Donghai vond ik informatie dat ik hieronder vertaald heb. Heeft niets met Donghai te maken maar voor mij was het nieuw. Ik wist dat er één was maar had nog geen foto kunnen vinden. | ||
 | ||
|
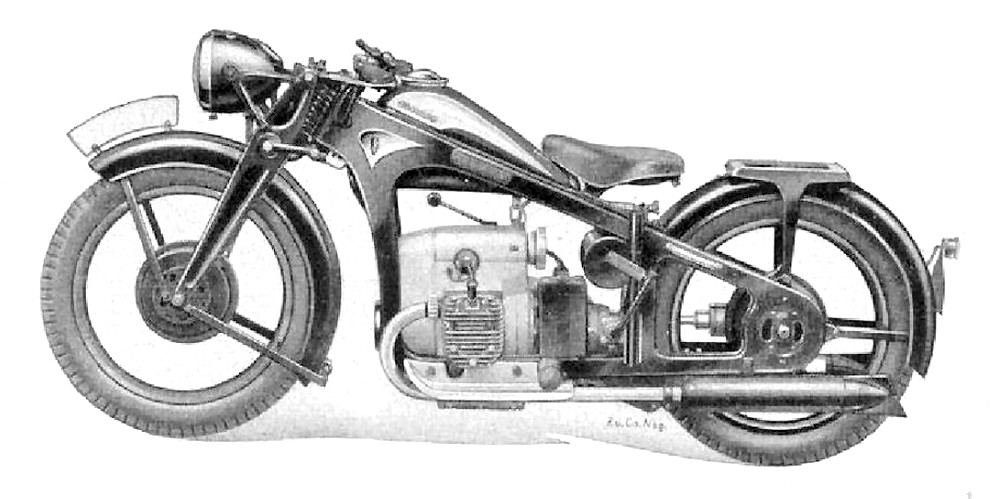
Eerste motorfiets Op 8 juli 1951 produceerde de zesde autofabriek van het Chinese Volksbevrijdingsleger in Peking de eerste serie motorfietsen van mijn land, genaamd "Jinggangshan", ter imitatie van de Duitse Schindler K500-motorfiets. Hier wordt waarschijnlijk de Zündapp K500 bedoelt. De naamgeving van de motor werd afgekondigd door Nie Rongzhen, waarnemend chef van de generale staf van het Chinese Volksbevrijdingsleger, om de heroïsche strijd in Jinggangshan voor altijd te herinneren. De motor is een luchtgekoeld tweecilindermotor met tegengestelde viertaktmotoren met een cilindervolume van 498 ml en een motorvermogen van 11,8 kW, het hoogste. De voertuigsnelheid is 110 km/u en het gewicht is 195 kg. De komst van motorfietsen van het merk "Jinggangshan" creëerde de geschiedenis van de motorfietsproductie in mijn land. | ||
 | ||
|
partsmanual publications picturepage geschichte history | ||
|
This site is designed and made by Ben van Helden copyright on all pages |

